-1.png?height=120&name=Polyprint%20Logo%20(Dark)-1.png)
A step-by-step guide on how to install accurately the Digital Factory Apparel Polyprint Edition RIP software.
System Requirements
Minimum System Specifications
| CPU | Dual Core 2.0 or higher |
| Hard Drive | 120 GB |
| RAM | 4GB + OS Requirements |
| OS | Windows 10, Windows 11 |
Recommended System Specifications
|
CPU |
Quad Core 3.0 or higher |
|
Hard Drive |
250 GB |
|
RAM |
16GB + OS Requirements |
|
OS |
Windows 10, Windows 11 |
Note: Internet connection is required during the installation of the software.
Program Installation
Step 1
Copy the installation files from the Polyprint USB key to your hard drive.
Step 2
Extract the files from the copied folder to your hard drive.
Step 3
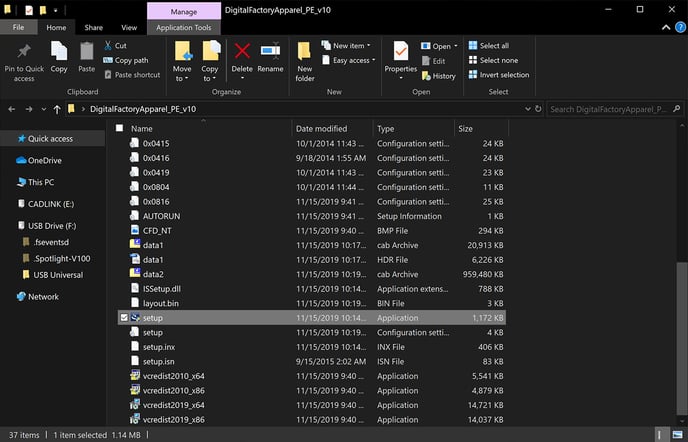 Open the folder and execute the installation file setup.exe, as administrator.
Step 4
Follow the instructions. First select Language and click OK.
Note: You can switch language from the Tools tab, at any point.
Step 5
Connect the Digital Factory Dongle to your PC and click Next.
Step 6
Select either the 32-bit or the 64-bit version depending on your system specifications and click Next.
Step 7
Read and Accept the license agreement and click Next to continue.
Step 8
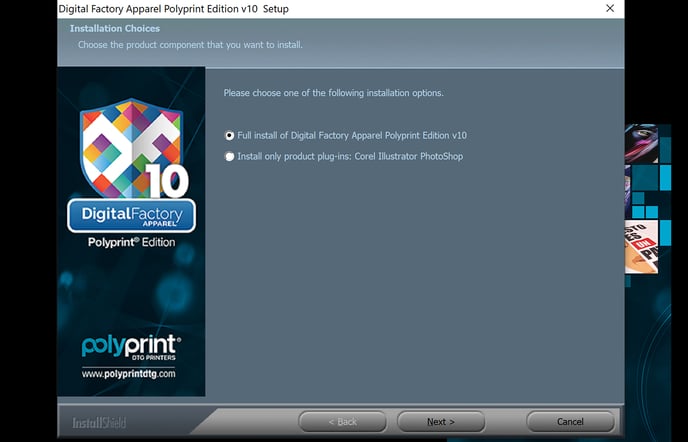 Select Full Installation of the Digital Factory Apparel Polyprint Edition and click Next.
Note: If you wish to install only the third-party software plugins, to quickly transfer your files from your designing-editing software to Digital Factory, select the second option. Those plugins are included in the full installation.
Step 9
If you wish, change the installation folder and click Next to install the Digital Factory Apparel Polyprint Edition.
Step 10
When done, click Finish to complete the installation.
TexJet® series printer installation
From the Windows Start menu, select All Programs > Digital factory Apparel Polyprint Edition.
Step 1
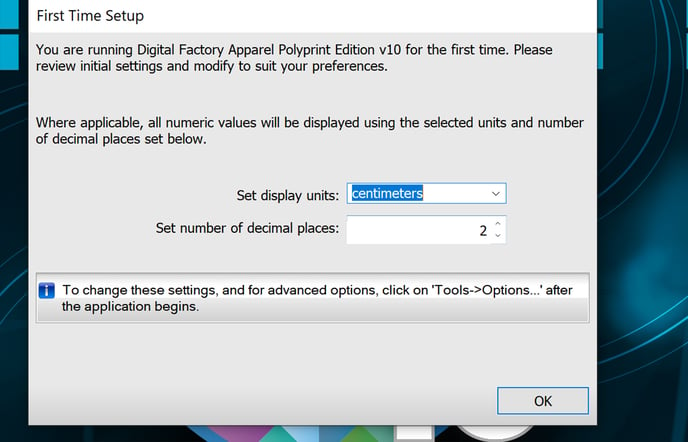 First Time Setup Screen will pop-up. Select the desired display unit, number of decimal places and click OK.
Note: In case Digital Factory dongle was not connected during installation, manually copy the two license files from the USB Dongle, to the Installation folder in your hard drive. Replace the existing files, inside the Installation folder.
Step 2
In Create Queue Wizard, Introduction page, click Next.
Step 3
On the pop-up, Install Printer window, select your purchased TexJet® series Model and click Next.
Step 4
Click Next so that the wizard can download the latest drivers from Web. Click Next and then Finish when download is completed.
USB Port configuration
a. Windows 10
Step 1
Before starting make sure TexJet® series printer is in READY TO PRINT state and USB cable is connected from the usb ‘labeled port’, to the pc.
Caution: If USB cable is connected at Polyprint Controller Port, TexJet® series Printer will not be recognized properly.
Step 2
 Inside RIP, find the Queue tab and click Manage Queues.
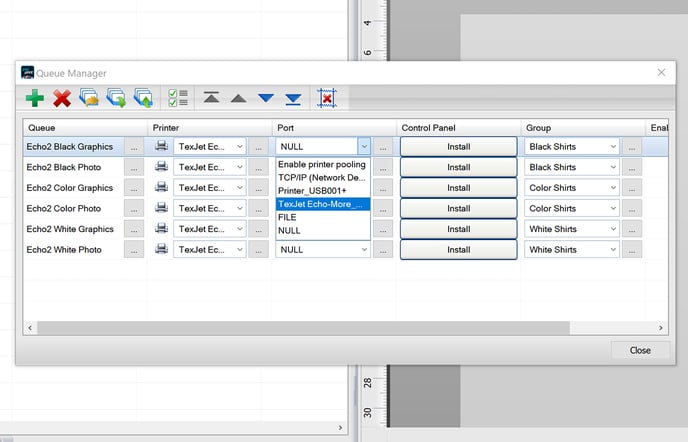
Step 3
At Port Column, select TexJet® (echo - more/ shortee) USB00x at every Queue and click Close.
Notes:
- Do not Select Printer USB00x.
- If you don’t see the option TexJet® (echo - more/ shortee) USB00x, check your USB connection and restart RIP.
b. Windows 11
Step 1
Go to the main toolbar and choose Tools. Then select Options.
Step 2
At the window that pops-up, in the General section, tick the box that reads “Allow selection of Window ports”. Click at Save and Close.
Step 3
At the main toolbar, go to Queue and then select Manage Queues. Select your port from the existing windows printer list. The correct port, after the Windows 11 update, should be the Printer_USB-00x+ were x is the USB port assigned to your TexJet printer.
LAN Port configuration
Step 1
Before starting make sure TexJet® series Printer is in READY TO PRINT state and LAN cable is connected both to the Printer Port and your PC or your Local Network Router.
Step 2
There are two ways to assign an IP address to the printer:
First way
If TexJet® series printer is connected directly to your PC, you must set static IP to both Printer and PC.To set Static IP at PC go to the LAN Connection Adapter properties. At the TCP/IPv4 protocol set:
IP Address: 192.168.0.xxx
Subnet Mask: 255.255.255.0
Default gateway: 192.168.0.xxx
Note: Where you see xxx, type a number from 001 to 255.
To set Static IP to TexJet® series Printer choose Settings on the top panel and navigate through: System Administration > Wifi/Network Settings > (scroll down) Advanced Setup > TCP/IP Address.
Set it to Manual and insert the values:
IP Address: 192.168.0.xxx
Subnet Mask: 255.255.255.0
Default gateway: The IP address that was assigned on the PC.
Note: Where you see xxx is, put a number from 001 to 255, different from the PCs.
Second way
If TexJet® series printer is connected to your Local Network and that supports DHCP, confirm that Subnet Mask and the first three brackets of the IP address on the TexJet® series printer and the PC match.To check TexJet® series Printer IP tap on Settings on the top panel and navigate through: Network Status > Wifi/ Network Status (scroll down).
Step 3
Inside RIP, find the Queue tab and select Manage Queues.
Step 4
From the Port Column, select TCP/IP (Network Device) and wait for Digital Factory to search your Local Network.
Step 5
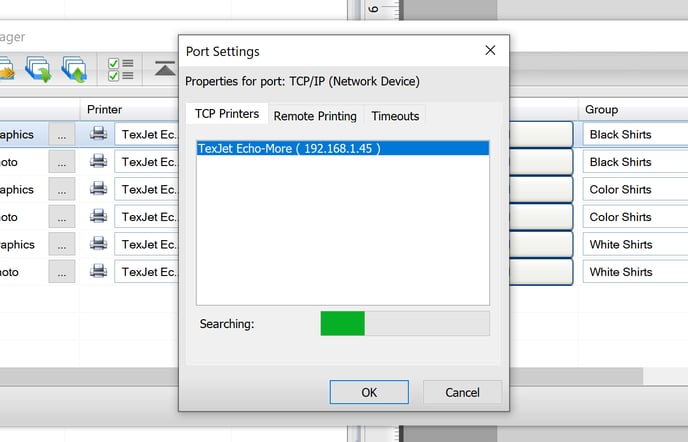 Select the TexJet® series model and click OK. Repeat for all the Queues and click Close.
How to get the latest updates in Digital Factory Apparel Polyprint Edition v10