-1.png?height=120&name=Polyprint%20Logo%20(Dark)-1.png)
In digital printing, both DTG (Direct-to-Garment) and DTF (Direct-to-Film) technologies generally have the capability to achieve approximately 60-70% color reproduction from the PANTONE® F+H Cotton TCX_Lab_D50_2deg palette.
Achieving optimal color reproduction in DTG-DTF printing, as well as in all digital printing applications, involves a combination of factors, ranging from capturing the image to the final printing process. This includes selecting settings and file types that preserve color accuracy and detail. It is also essential to maintain a clean workflow by minimizing unnecessary adjustments and conversions.
Here are recommended file types and settings for digital printing:
File Formats:
The RIP software supports a variety of file formats and can be effectively utilized under specific conditions. For instance:
TIFF (Tagged Image File Format): TIFF is a popular choice for digital printing due to its lossless compression and support for high-quality images. It preserves color accuracy and detail, making it suitable for professional printing applications.
PDF (Portable Document Format): PDF is commonly used for document printing but can also be suitable for images. When saving images in PDF, ensure that the compression settings maintain high quality.
PNG (Portable Network Graphics): While PNG is commonly employed for web graphics, it is a lossless format suitable for high-quality images, making it apt for projects where preserving color accuracy is paramount. Since PNG files don't inherently contain an embedded color profile, it is advisable to use the sRGB ICC color space within your image editing programs to ensure consistent and accurate color representation.
Image settings:
Embed Color Profiles in Files:
When saving your image files, make sure to embed the color profile. This ensures that the color information is retained and can be interpreted correctly by the printer.

Transparency-supported file format:
The presence of transparency in the image is crucial for printing on a dark garment, as it allows the RIP software to generate the necessary white underbase to cover the garment color. This enables the printer to accurately reproduce colors and details. Transparency facilitates the correct interaction between the image and the white base, ensuring a uniform and precise result during printing. File types supporting transparency are for example TIFF, PNG, PDF etc.
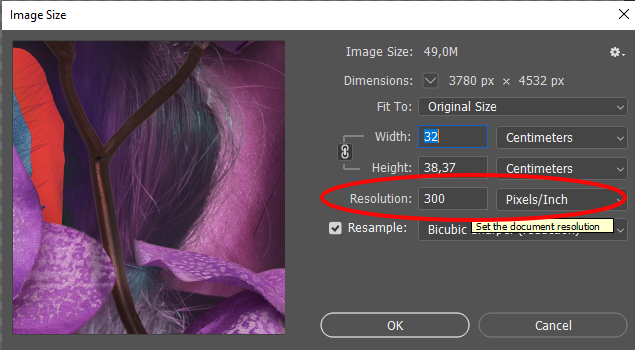
Image Resolution:
Use high Image Resolution (300 dpi or higher). For digital printing, it's crucial to use high-resolution images to ensure sharpness and detail. A resolution of 300 dots per inch (dpi) is a standard for high-quality print output.
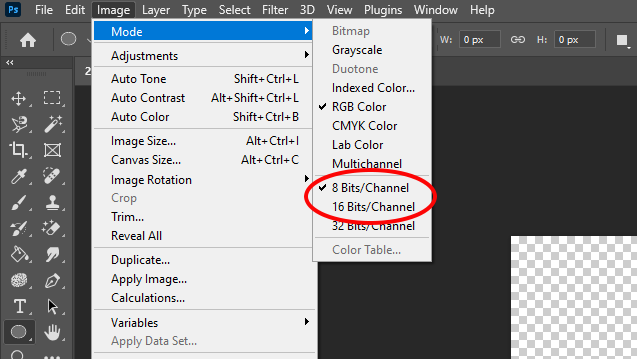
Use Bit Depth 8-bit or higher:
Higher bit depths allow for a broader range of colors and tones, which can be beneficial when printing images with subtle color variations.
Workflow:
Editing in a Color-Managed Environment:
Work in a color-managed environment using image editing software that supports color profiles. This helps maintain consistent color reproduction across different devices.
Soft Proofing:
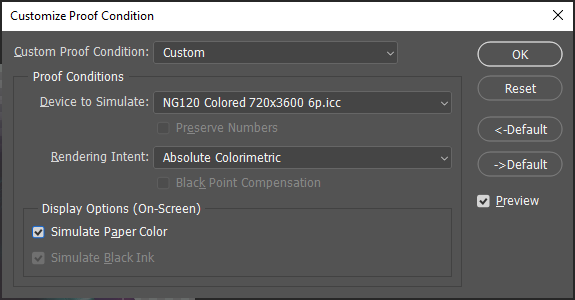
Visualize a Proof: Before proceeding with the final print run, it is recommended to utilize soft proofing within your image editing software. Convert your image to the CMYK color space and apply a color profile that corresponds to the printer’s print mode you are going to use. This process allows you to visually simulate how the colors will appear in the final print. Use the soft proof to assess color accuracy and overall quality and make necessary adjustments before finalizing the print job. Soft proofing is a crucial step in ensuring that the printed output aligns with your expectations and requirements.
Monitor Calibration:
Ensure that your monitor is calibrated regularly to display colors accurately. This step is critical, as the way colors appear on an uncalibrated monitor can differ significantly from their actual values.
Avoid Compression:
Minimize Compression: If you need to use a compressed format like JPEG, use minimal compression to avoid loss of image quality. Some printing processes can be sensitive to compression artifacts.
RIP software Digital Factory Apparel Polyprint Edition v10:
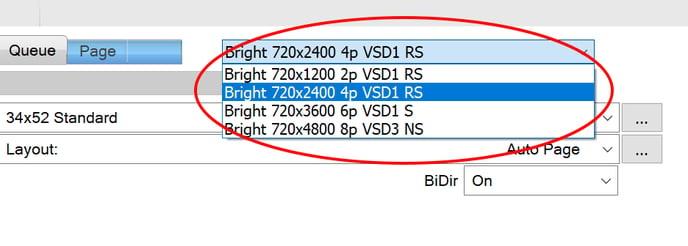
Print mode Selection:
Choose the appropriate print mode based on your requirements using the RIP software. During this process, your image will undergo conversion to the CMYK color space, utilizing the Lab D50 2-degree observer color space. To ensure precise color reproduction, the RIP software provides specific ICC profiles for all various printing qualities. This optimizes color accuracy in the final output.
Graphics and Photo setting:
Choose the appropriate rendering intent. Photo (Perceptual intent) prioritizes visual consistency and overall harmony, while Graphics (absolute colorimetric intent) prioritizes precise color accuracy, even if it means sacrificing overall visual consistency. The default setting of the RIP software is set to Photo.

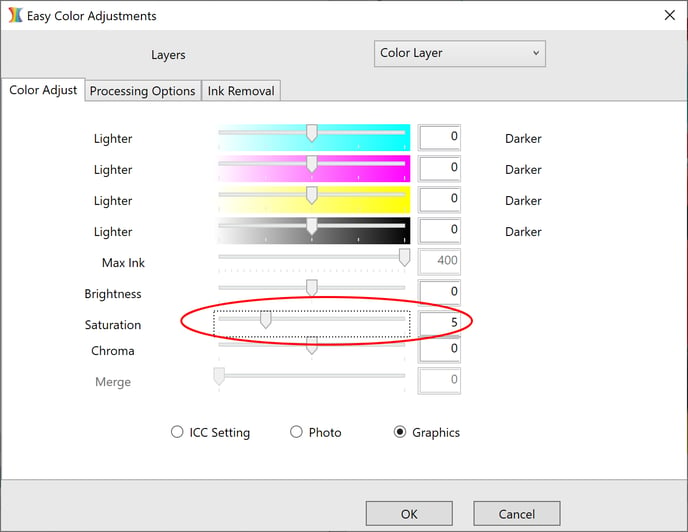
Saturation settings:
Increasing the saturation of an image is a method used to enhance the vibrancy and intensity of colors, making them appear more vivid and lively. However, while this technique can make colors more visually striking, it may impact color accuracy, depending on how it's applied. Moderate increases in saturation can enhance visual appeal without significantly sacrificing accuracy. We recommend using the saturation setting not higher than +5.
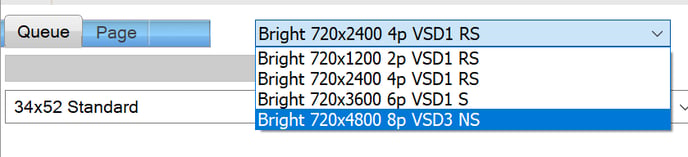
Consider the use of a higher printing resolution:
If none of the processes proves effective in achieving the desired color, one potential remedy is to opt for a higher printing resolution. Here's why this change can contribute to resolving color-matching issues:
Improved Color Rendering:
Printing at a higher resolution can enhance the printer's ability to accurately render colors, especially for complex color profiles. This is beneficial for images with a diverse range of colors, ensuring that each hue is faithfully reproduced.
Increased Color Detail:
Higher printing resolutions entail a greater number of dots or pixels per inch (DPI), allowing for more detailed and nuanced color reproduction. This increased level of detail can help capture the subtleties of the original image more accurately.
Enhanced Color Gradation:
A higher resolution facilitates smoother color transitions and gradient fills. This is particularly beneficial for images with gradual color changes, as it mitigates issues like banding and ensures a more seamless blending of hues.
Sharper Image Reproduction:
When printing at a higher resolution, the printer has more information to work with, resulting in sharper and clearer image reproduction. This can contribute to a closer match between the intended and printed colors.
Reduced Pixelation:
Higher resolutions help minimize pixelation, ensuring that the printed output closely mirrors the clarity and definition of the original digital image. This is crucial for reproducing intricate patterns, text, and fine details accurately.
By adhering to these recommendations, you can enhance the likelihood of achieving accurate and vibrant color reproduction in your digital prints.
If you've followed the correct processes, but still notice a specific color discrepancy between the image and the printout, it is possible that the color in your image lies outside the color gamut of the printer's ICC profile. This may lead to color shifts or inaccuracies during the printing process. There are a few additional steps you can take to troubleshoot and address the issue:
In the image editing software:
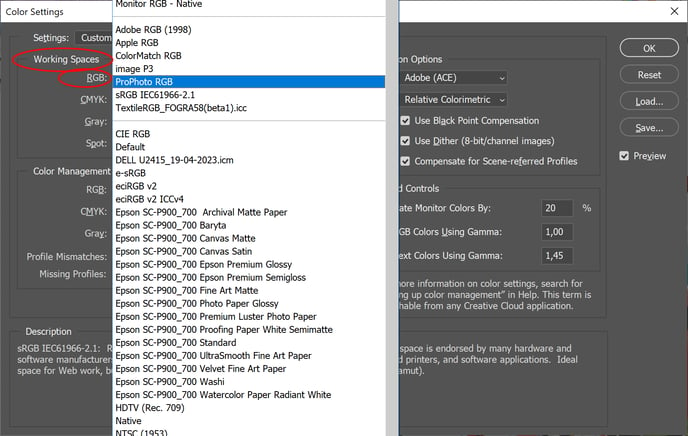
Use a Different Color Space:
Consider working in a larger color space, such as ProPhoto RGB, when editing your images. This provides a wider gamut and more flexibility in representing colors.
Adjust Colors in your image:
Manually adjust the out-of-gamut colors in your image to bring them within the printable range. This may involve desaturating certain colors or shifting them to more printable hues. Keep in mind that this process may require some experimentation and careful consideration of the visual impact on your image.
Selective Color Correction in your image:
If only specific colors are out of gamut, focus on correcting those colors selectively. Use adjustment layers or tools in your image editing software to target and adjust the problematic colors.
Understand Limitations:
Be aware that some colors, especially highly saturated or fluorescent colors, may be challenging to reproduce accurately. Understanding the limitations of the DTG-DTF printing technology and the specific color gamut of your printer is crucial for managing expectations.
Sample Testing:
Before committing to a full print run, it's advisable to conduct tests by printing a small section of the image as a sample. This allows for a visual assessment of whether the adjustment contributes to improved color matching.
In the RIP software:
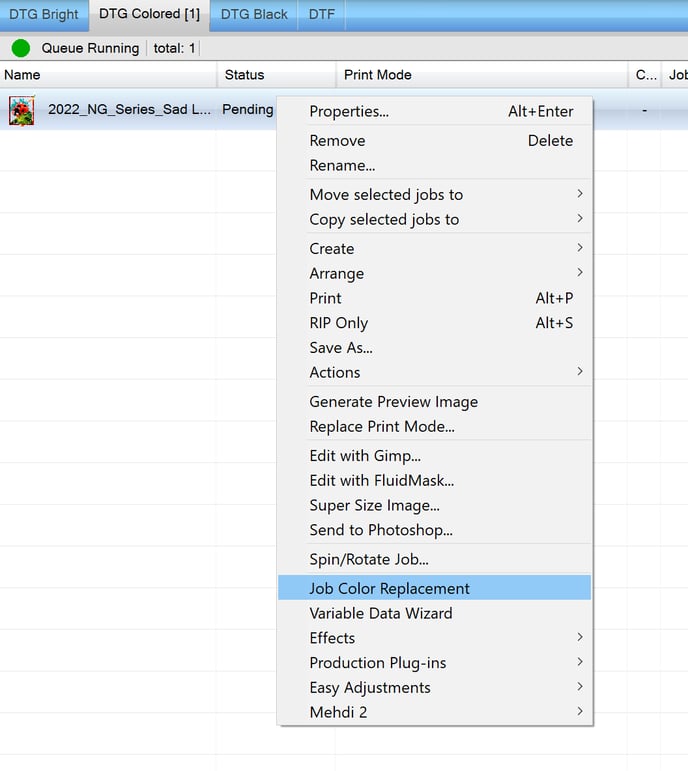
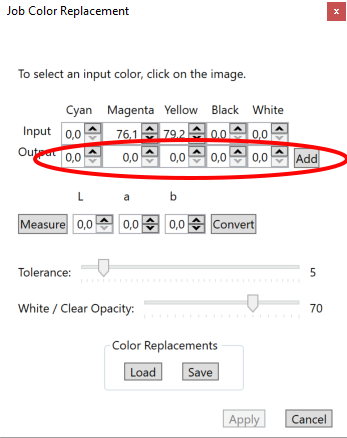
Job Color Replace:
If the color discrepancy involves a specific spot color, then you can use the Job Color Replacement feature. This feature allows you to replace or convert one color in the design with another CMYK value. It can be particularly useful when working with spot colors or graphic images. The desired CMYK value can be obtained from color swatch books.
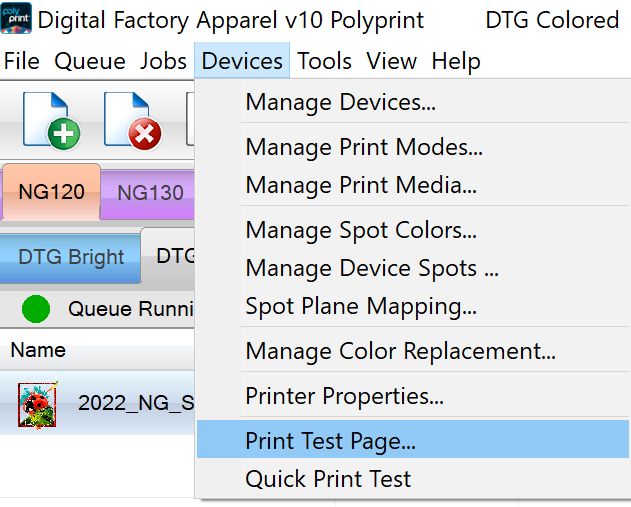
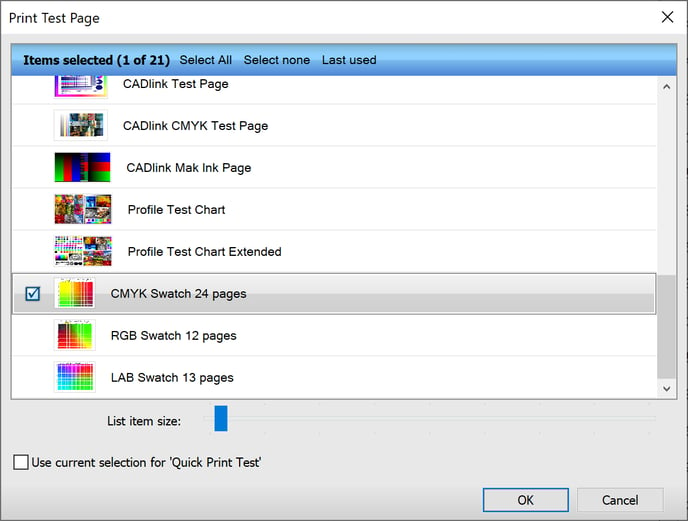
Use color swatch books:
Color Swatch books are valuable tools that aid in achieving color accuracy. The RIP software provides CMYK Swatch books under the "Print test page" option, allowing you to print them on your desired media. The color samples accurately represent the range of colors available in its color space for the specific Print mode.
Specific colors can be selected from the Swatch book, and their CMYK reference values can be used in the Job Color Replace feature to match and reproduce colors accurately on the final printed materials.
Remember that achieving accurate color reproduction can be complex, and there might not always be a perfect solution for every color. It often involves striking a balance between the desired visual outcome and the technical capabilities of the printer, the media you are using and the color density of the inks.