A detailed process of how to properly unbox and accurately install the Pretreater Pro pretreatment machine.
Unboxing Pretreater Pro
Step 1
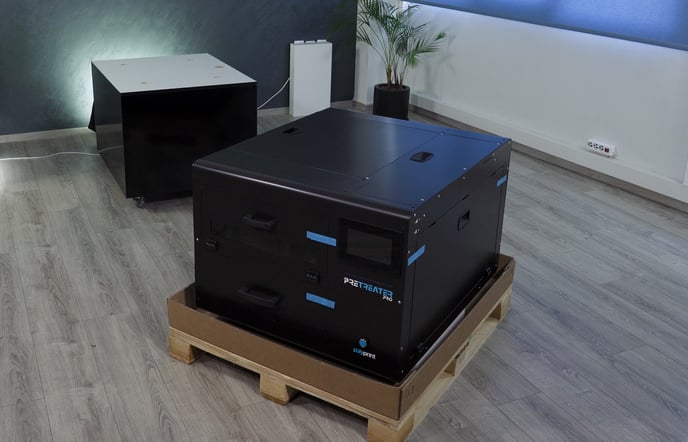 First, remove the top cover from the carton box and right after, the styrofoam sheets, as well as the side carton cover to reveal the machine.
Step 2
Place PreTreater Pro onto a flat and stable surface with dimensions of at least 670x790 mm (26.3"x31.1"). The surface should be capable of supporting more than 130kg.
Notes:
- The machine weighs 100 kg approximately, hence it requires 4 people to lift it. Always carry it from the bottom. Never lift it utilizing the drawer handle, nor the Nozzle Access Cover.
- The height of the machine on the front side must be 660 mm (26 in.) and on the backside 643 mm (25.3 in.). If not, adjust the feet accordingly.
Step 3
Remove the blue security tapes from all the PreTreater Pro covers and open the Nozzle Access Cover. Remove the yellow Safety Bar from the Nozzle Carriage.
Step 4
Open the drawer and check that the table is properly placed on it.
Note: Avoid places subject to rapid changes in temperature and humidity. Also, keep the machine away from direct sunlight and heat sources. Ideal operating conditions are 22°C-26°C temperature and 55% humidity.
Liquid Installation
Step 1
Open the Tank Access Cover to gain access to the Tank Storage Compartment.
Step 2
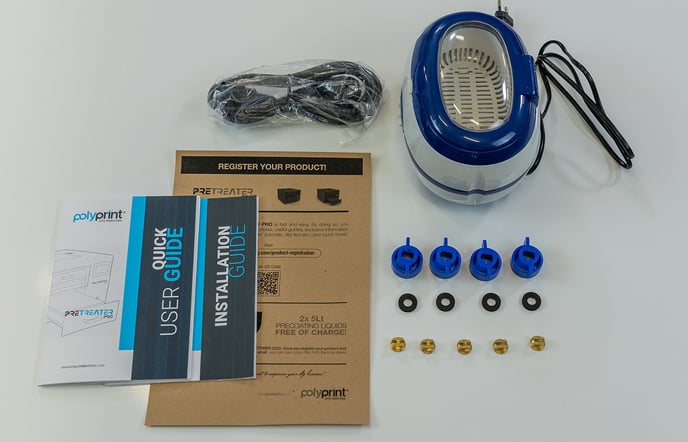 Take out the box & the device you will find inside and check you have everything you need:
- Five (5) Nozzles
- Four (4) Empty Tanks
- Four (4) Gaskets
- Four (4) Blue Nozzle Holders
- One (1) Ultrasonic Device
- One (1) Power Cable
- One (1) Quick Installation Guide
- One (1) Quick User Guide
- One (1) Polyprint USB Key
- One (1) Registration Page
Step 3
There are 4 empty tanks in the slots L1, L2, CL, and MT. You can fill the empty tanks or directly use a new pretreatment tank in its place.
Step 4
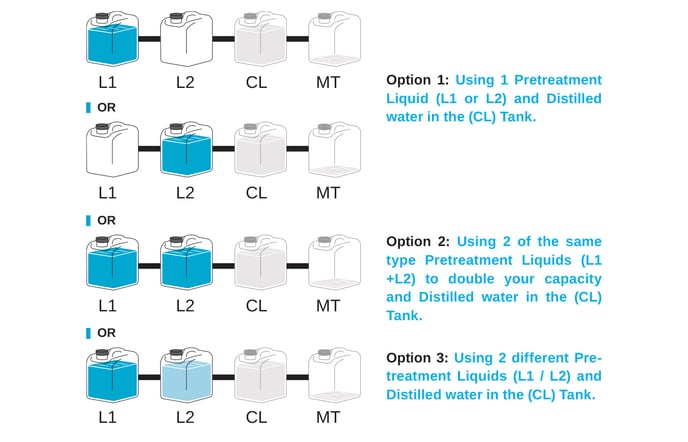 Fill/Replace Tank L1 or/and L2 with the pretreatment liquid you are going to use. In case of using 2 pretreatment liquids, fill/replace both Tanks L1 and L2 with the according pretreatment liquid.
Step 5
Fill the Tank CL with distilled water.
Note: Shake the new tanks/bottles with the pretreatment well, before using them inside the machine.
Tank Filling Procedure
Step 1
Take the tank out of the slot and open its cap. Then, take the tubes out.
Step 2
Shake the pretreatment bottles well, before filling the tanks.
Step 3
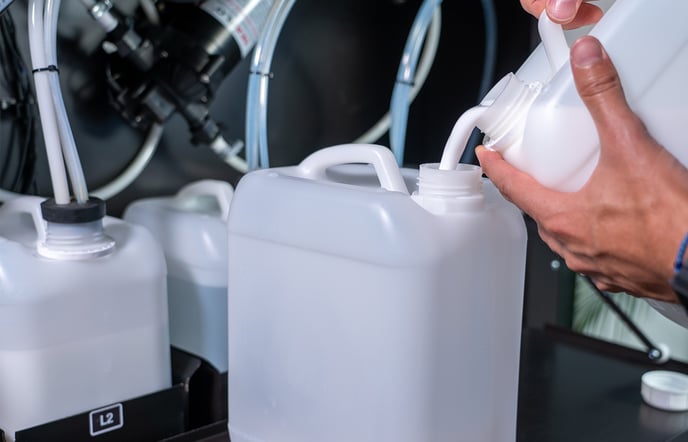 Fill the tank with the pretreatment liquid. Ensure that it’s with the same pretreatment liquid type.
Step 4
Put the tubes inside the tank and close the cap. Ensure they are in place and properly sealed.
Step 5
Put the tank back into the slot and close the Tank Access Cover.Tank Replacement
Step 1
Take the tank out of the slot and open its cap. Then, take the tubes out.
Step 2
Shake the pretreatment bottles well, before replacing the tanks.
Step 3
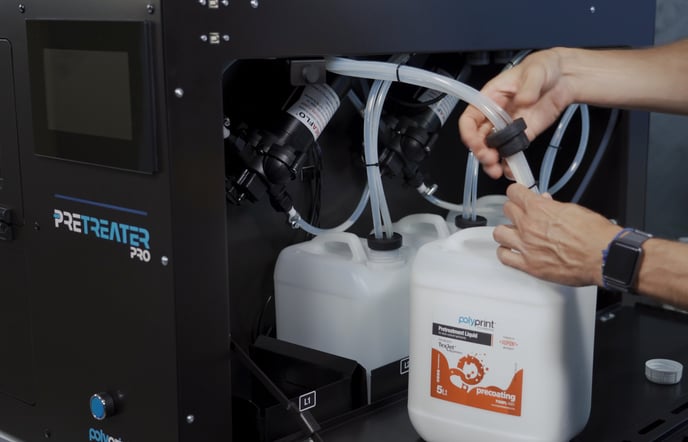 Put the tubes inside the new tank and close the cap. Ensure they are in place and properly sealed.
Step 4
Put the tank back into the slot and close the Tank Access Cover.
Note: Before closing the Tank Access Cover, ensure that all the tubes are inside the tanks and that the caps are in place and properly sealed.
Tip: You can use the Tank Access Cover as extra workspace.
Power ON for the first time
Step 1
Plug in the power cord. Make certain that the source voltage is the same as the rated voltage, listed on the serial number/rating plate. Power On the machine from the Main switch, that is placed at the backside of PreTreater Pro.
Step 2
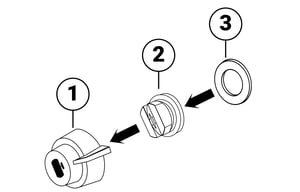
Assemble the nozzles by following the steps below:
- Open the Nozzle Access Cover.
- Insert the nozzle inside the blue nozzle holder.
- Position the black gasket inside the blue nozzle holder and push it, in place, to tighten.
Step 3
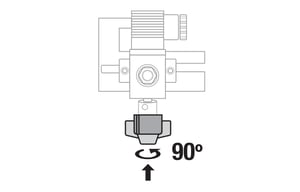 Place inside the Nozzle Carriage Chamber the nozzle assemblies. Attach the nozzle assembly to the carriage and turn it 90 degrees counterclockwise to lock it in position.
Initial Liquid Charge
Step 1
To initiate the machine, tap the screen.
Step 2
Check that the CL, L1 and/or L2 Tanks are full and that all four (4) nozzles are properly placed into position.
- Press Confirm to continue with the liquid charge.
- In case you installed pretreatment liquid in L1 or L2 Tank, select the one you filled.
- In case you installed pretreatment liquid in both L1, L2 Tanks, select the one you wish to use first.
Step 3
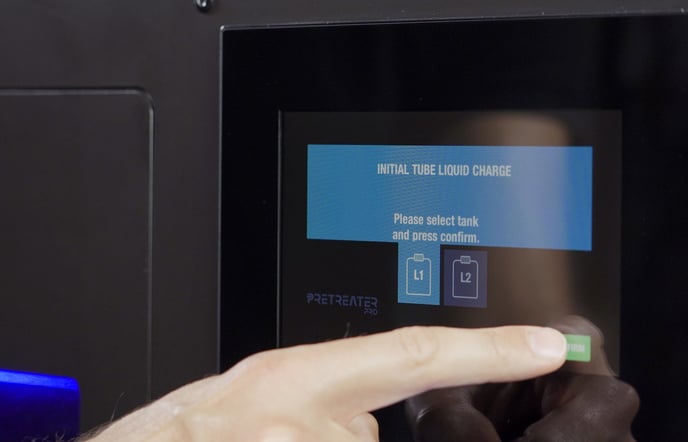 Press Confirm. After a couple of seconds, the initial liquid charge will finish.
Step 4
The machine is now filled with liquid and ready for operation.
Caution: If there is no liquid flowing, then check that all the tubes are inside the tanks and that the caps are in place and properly sealed.
Note: If you get any error messages, for further information, check the topic: Troubleshooting > General Problems in the Operational Manual that you will find in the USB Polyprint key.
Nozzle Check
You should perform a nozzle check to see if all four nozzles are firing correctly.
Step 1
To perform the nozzle check, start from the Home screen.
Step 2
Press the Nozzle button.
Tip: You can, also, open the Nozzle Access Cover to have a better view.
Step 3
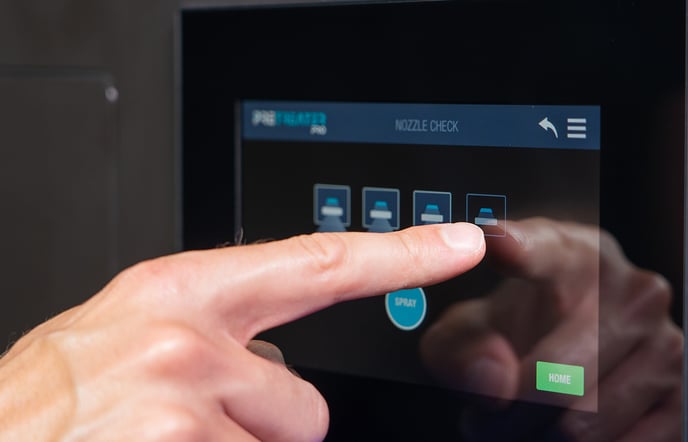 Enable all the nozzles, one-by-one, (or only the nozzles you want to check).
Step 4
Press the Spray button. Each nozzle should be firing in an 80 degrees angle.
Step 5
Exit the Nozzle Check screen, by pressing the back arrow, to return to the Home screen.
Note: If the nozzles are not firing correctly, for further information, check the topic: Troubleshooting > Spraying problems in the Operational Manual that you will find in the USB Polyprint key.
-1.png?height=120&name=Polyprint%20Logo%20(Dark)-1.png)