-1.png?height=120&name=Polyprint%20Logo%20(Dark)-1.png)
A troubleshooting guide on how to restore a lost print queue tab.
Digital Factory offers four main print queue tabs. Three of them are based on the substrates’ color and one is dedicated for the DTF technique. If you open your software and it happens that one of them is not visible, follow the steps below so it can be restored:
Disabled print queue
The most quick way is to check if the print queue was disabled by mistake.
STEP 1
At the main toolbar, go to Queue and then, at Manage Queues.
STEP 2
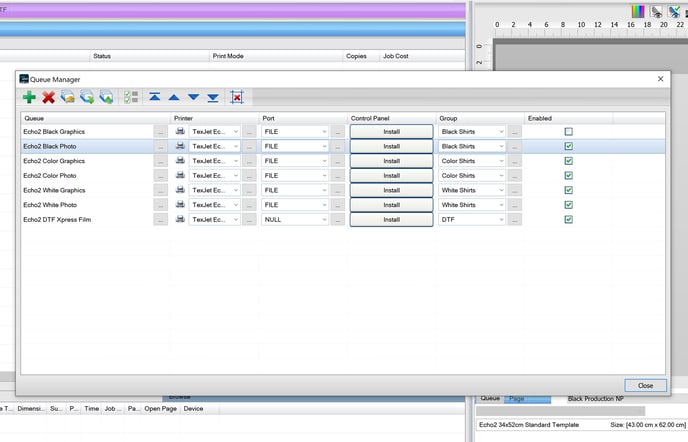 At the queue manager window that pops-up, move the slider bar to the right. Check if the missing print queue is enabled or not.
Tick the box if not. If it is enabled but it’s not showing on the RIP’s interface, then proceed with the following steps:
Print queue restoration
Caution: The Rip software will be reset back to default settings. Save all your customized print jobs, queues, modes and media before proceeding.
STEP 1
At the main toolbar, go to Queue and then, at Manage Queues.
STEP 2
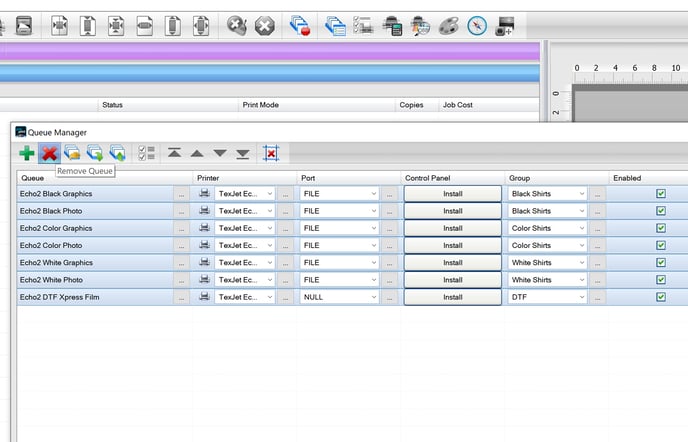 Select all the print queues and remove them by pressing the X icon (Remove queue).
STEP 3
From the main toolbar go to Devices and then, select Manage Devices.
STEP 4
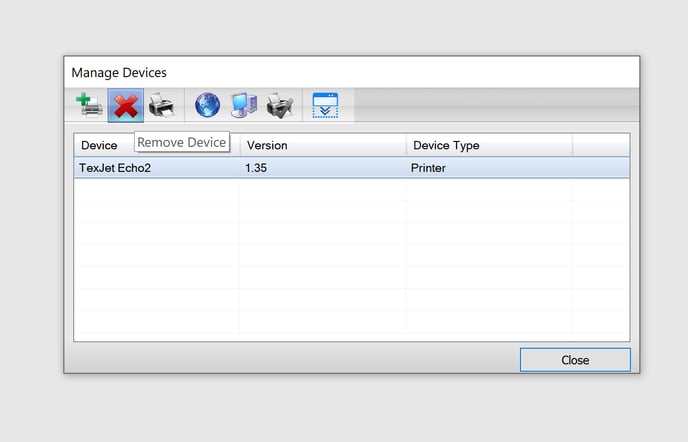 Select your device (printer) and then, click at the X icon (Remove device).
STEP 5
Add again your device and all the settings will be restored, including the print queue that went missing.