-1.png?height=120&name=Polyprint%20Logo%20(Dark)-1.png)
All you need to know about the printhead control panel of TexJet echo2 printer. Navigate with ease and perform standard procedures from specific buttons.
The printhead control panel is the top panel of the printer and consists of 3 Panel buttons and a touch screen which has several display buttons. From them you only need the following in order to operate the printer:
Panel buttons’ functions
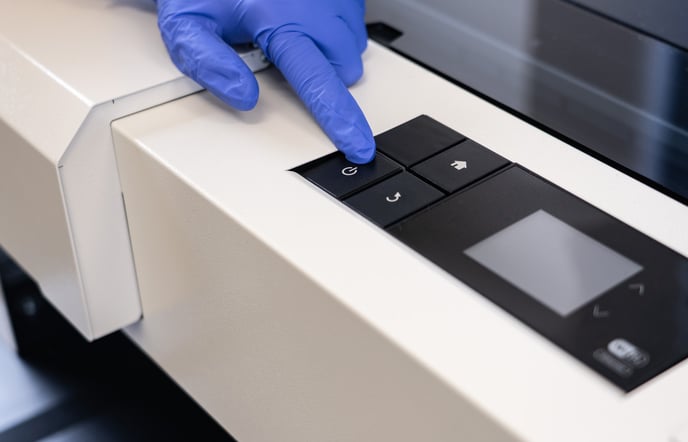
Power button. Press the Power button to turn on or turn off the printer.
Return button. Press the Return button to find the previous display page.
Home button. Press the Home button to find the main menu page.
Touch screen display buttons’ functions
Cartridge chip level
Tap on the drop icon, on the bottom left of the screen, to check the cartridge chip level of all ink cartridges and the waste tank.
Settings
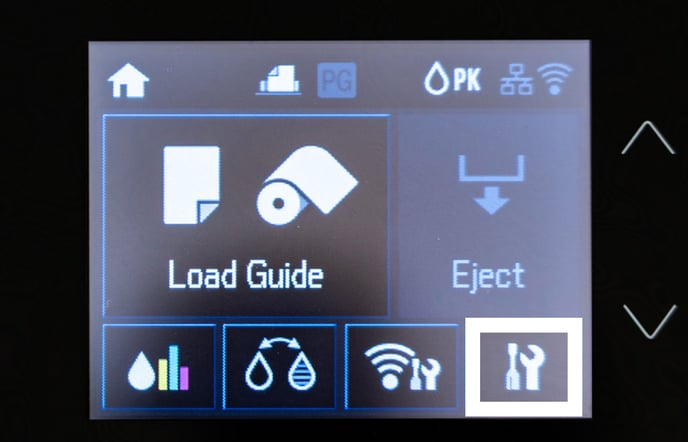
Tap on the Settings icon to open the settings page. Navigate according to your needs:
Choose Maintenance, Print Head Nozzle Check and Print to perform a nozzle test.
Choose Maintenance, Print Head Cleaning and Head Cleaning to perform a head cleaning.
Choose Maintenance, Heavy Head Cleaning and Head Cleaning to perform a heavy head cleaning.
Choose System Administration, Wi-Fi/Network Status, press the down arrow to find the Advanced Setup, TCP/IP Address, Manual and tap the static IP address.
Choose Print Status Sheet, Usage History Sheet and Print to print the total prints of the printer.
Note: All the rest buttons and functions are not intended for user handling and should remain the same as factory defaults.