-1.png?height=120&name=Polyprint%20Logo%20(Dark)-1.png)
A guide with all options on how to unbox properly a NG printer from its crate and transport it to its home location.
Caution: The unboxing the Texjet NG printer requires a certified forklift truck with forks of at least 180cm length and a certified forklift user to operate it. Do NOT proceed if those requirements are not met.
Unboxing with forklift: 180cm fork length
STEP 1
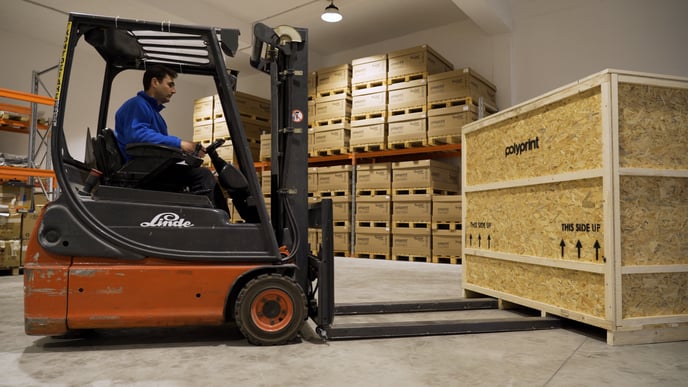 Drive the forklift so the forks slide beneath the crate from the side marked as Side Up. Then, carefully, lift the crate and move it to the desired location.
STEP 2
Remove the screws holding the top cover of the crate by using an electric screwdriver. Set aside the top cover.
STEP 3
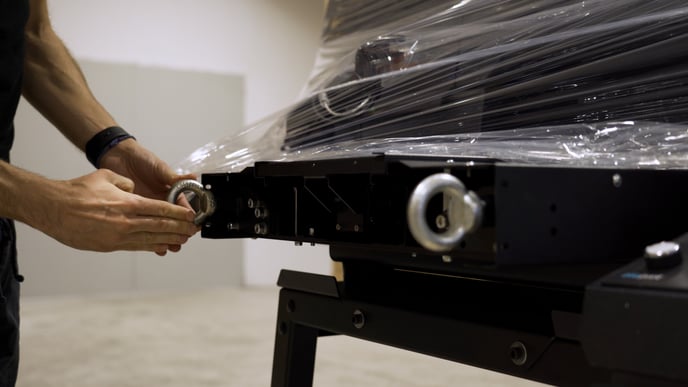
Using the electric screwdriver again, remove the screws from the Side Up cover and the one placed Left of it. Set aside the two covers.
STEP 4
 Unlock the protective straps and remove them by sliding them though the machine.
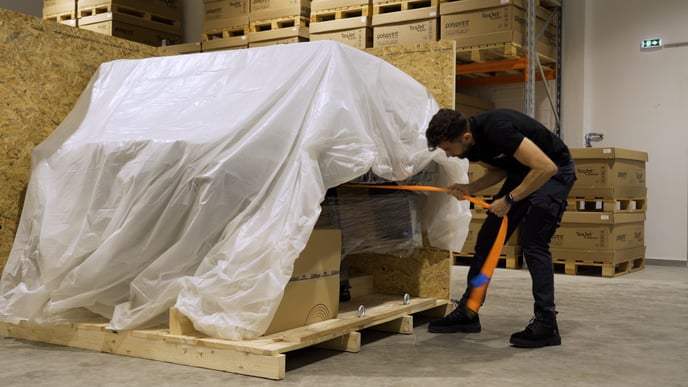
STEP 5
Remove the consumables box and set it aside. Also, remove the dust-protective membrane to reveal the printer.
STEP 6
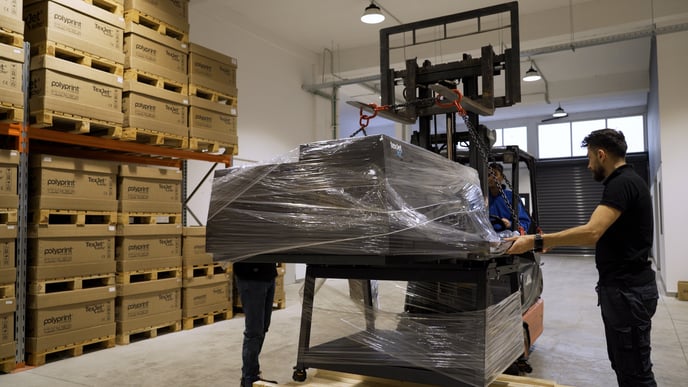
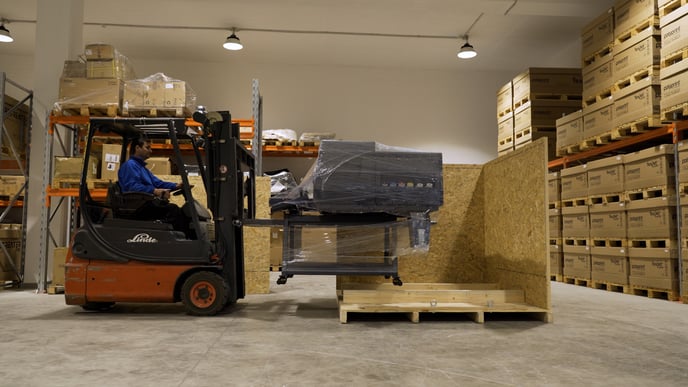 Using a fork length of at least 180cm, slide the forks beneath the base of the printer, looking at the front side of the printer. Lift the printer carefully and transfer it to its final location.
Unboxing with forklift: Lifting Chains
Notes:
- In case your forklift truck is equipped with less than 180cm fork length, then its vital you use the Lifting Chains for the printer transportation.
- The minimum fork length required in this case is 110cm.
- Follow the steps 1 through 5 from the Unboxing with 180cm Fork Length guide above.
STEP 1
Open the box that contains the Lifting Chains and make sure it includes:
- Two (2) small-length chains. One is a couple cm shorter than the other.
- Two (2) bigger-length chains. One is a couple cm shorter than the other.
- Two (2) lifting eyelets with short nut.
- Two (2) lifting eyelets with long nut.
STEP 2
 Facing the front side of the printer, remove the four screws positioned at the right and left side of the chassis’ cover using an Allen Key No.3. Remove and set aside the cover.
STEP 3
 Place and tighten the Lifting Eyelets with short nut on the eyelet guide in vertical position. This is to ensure that when the chains are attached to them, they don’t scratch the machine’s covers.
STEP 4
 Remove the plastic covers from the top cover to get access to the eyelet guide. Place and tighten the Lifting Eyelets with long nut on the eyelet guide on the top back cover of the printer.
STEP 5
Place the Lift Chains’ big hoops on the forks of the forklift and make sure the chain connecting them is not loose. The bigger length chains face the front of the printer where the Lifting Eyelets are. Lift the forks so the chains meet the height of the eyelets.
STEP 6
Connect all the hooks to their corresponding lifting eyelet. The lengthier chain from each pair should be connected to the left eyelets (away from the forklift).
STEP 7
 Lift the printer carefully and transfer it to its home location.
STEP 8
Remove the Lifting Chains and the Lifting Eyelets, and place back the front cover.
Caution:
- Place this product on a flat, stable surface of at least 3000x3000mm (LxW). Printer dimensions are 1850x1850x1750mm (LxWxH). The surface should be capable of supporting 600kg or more.
- Avoid places subject to rapid changes in temperature and humidity. Also keep the printer away from direct sunlight and heat sources. Ideal operating conditions are 20oC (68F) temperatureand 55% relative humidity.