-1.png?height=120&name=Polyprint%20Logo%20(Dark)-1.png)
A step-by-step guide on how to print on shoes using Polyprint’s TexJet echo2 printer
TexJet® echo2 printer offers the possibility of printing on canvas shoes, as it is equipped with special shoe platens that can be adjusted easily on the printer. There is a main platen mounted on the printer and smaller extra plates that are adjusted on the sides of the above main platen, to help you place the shoes correctly. In the RIP software, the platen with the adjustable side plates appears as one template, named as Small, Medium or Large corresponding to the size of the extra plates that are placed each time.
.jpg?width=688&name=shoe%20dtg%20printing%20(2).jpg)
In order to print on the shoes’ canvas successfully, follow with ease the steps below:
Step 1
Mount the shoe platen on the printer with the screws it came with.Step 2
Choose the right extra plates according to the shoe’s size and place them on the sides of the main platen.
Step 3
Prepare both the platen’s and plates’ surface with double-sided tape. By doing this, the shoe sticks to the surface and the chance of moving during printing is eliminated.
Step 4
Place the first shoe on the platen. Place the shoes, like you would wear them, on the side smaller plates. Turn the shoe on its side and push it through the extra side plate until it reaches the sole. Make adjustments by pressing the shoe’s canvas on the platens in order to keep the surface flattened.
Step 5
Place the second shoe as well following the exact directions given in step 4. You can print both shoes simultaneously!
Step 6
Place duct tape around the soles (or anywhere you don’t want the ink to land) in order to avoid printing on it.
Step 7
Set the correct distance between the platen and the printhead, by pressing the Auto button.
Step 8
Select the design you want with the RIP software. Make sure that you choose the suitable template for your selected shoe size.
Basic printing process with Digital Factory Apparel Polyprint Edition v10
Tip: If the shoe surface is uneven, you can choose the Uni-directional print option that maintains sharp details even while printing at a bigger distance from the printhead.
Step 9
Start printing and enjoy the process! Small details like tiny letters, signatures, thin lines as well as color gradients can easily be reproduced in your shoes.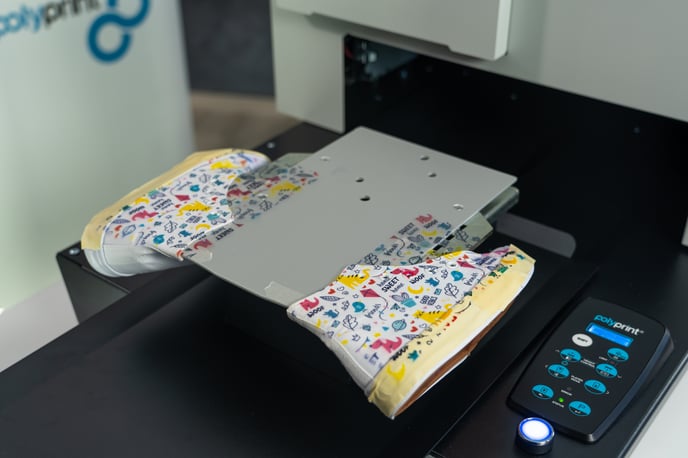
Step 10
When the printing is finished, remove the duct tape from the soles and afterwards the shoes from the platen.
Step 11
Proceed to cure the print using a heat press specially designed for shoes’ fixation.
Inks & Pretreatment Liquids: Fixation times and temperatures
The variety of the extra shoe plates that TexJet® echo2 printer offers, makes it possible to print on any size shoe you want! For example, you can print exceptionally vivid and playful designs on kids’ sneakers, by simply placing the smaller extra plates on the main platen and choosing the Small size template in the RIP software.
Note: The company’s older models, TexJet® echo and TexJet® Plus Advanced, are also compatible with this printing technique. There is only a difference on how to mount the shoe platen onto the printer. The procedure remains exactly the same after that.