-1.png?height=120&name=Polyprint%20Logo%20(Dark)-1.png)
A guide on how to print successfully on hoodies. What fabrics to look for, how to pretreat, useful RIP settings, and the proper garment loading procedure to give you the best possible results.
A hoodie is a timeless clothing piece that originates from the sports world, as athletes used them to keep warm during their training. Since then, it’s been incorporated by various fashion trends, from athleisure and streetwear, to even stylish runway looks. Hoodies can be effortlessly dressed up or down, as they can be pared with sweats and even tailored pieces. In addition, they are a unisex clothing choice, so everyone can wear them.
Direct-to-garment printing is the perfect solution to print on hoodies, as you can get vivid, rich colors and outstanding white ink density that will make your designs come to life and be desirable by even the most demanding customers. With DTG you can print on every possible area of the hoodie, meaning on the hood, the kangaroo pouch, and even on the sleeves.
Suitable DTG hoodie fabrics
DTG printing is mostly suitable for natural fabrics and can also provide very good results on blended fabrics. For this reason, pure cotton hoodies are preferred, as the pretreatment liquid and the inks (that are water-based) can fixate better on the fibers. If you opt for blended fabrics, a heavy cotton blend is more suitable - one of the most common being the 80% cotton & 20% polyester composition. As the ratio of cotton decreases, the more difficult it is to print on hoodies, due to the increased number of synthetic fibers that are repealing the water-based inks. Keep in mind that at first you may gain a satisfying printing outcome, but when it comes to the print’s fixation a not so pleasing result might be obtained.
Check here what fabrics are suitable for DTG printing.
Hoodie pretreatment process
Regarding light colored hoodies, a pretreatment application is not vital, as you can obtain rich, vibrant colors only with your inks. One the other hand, if you have a blended garment, then you should definitely apply a pretreatment solution - like Texjet Inks - Pretreatment for Lights solution that stabilizes the ink on the fibers, meanwhile boosting the inks’ endurance during the washing cycles.
Tip: For the Texjet Inks - Pretreatment for Lights solution we recommend 25-30 ml for a 41x60 cm (16.1x23.6 in) area, in a single or double pass.
As far as dark colored hoodies go, where a white underbase is required, the pretreatment application is vital in order for the white ink and therefore the colors, to be visible. For this reason, you should use a solution like Texjet Inks - Pretreatment for Darks that will help you achieve an opaque and dense white ink layer. A common practice that is proven very successful, is the double pretreating. The process includes spraying the amount that you usually apply in t-shirts, press it for 15-20 sec, then spray again and press for the full time (30-40 secs) until fabric is completely dry. Always use heavy pressure for the fibers to be laid down.
Tip: For the Texjet Inks - Pretreatment for Darks solution we recommend 40-45 ml for a 41x60 cm (16.1x23.6 in) area, in a single or double pass.
If you are a PreTreater Pro user or looking into an automated machine for your business, take a look at the basic pretreatment procedure
Printing on dark-colored hoodies
 When printing on thick or heavier synthetic blends, you may need to also adjust some settings in your RIP software. To gain the best printing results, regarding the white ink layer, the most common settings are:
Quality print mode
The inks are being printed in a higher resolution, meaning that the printhead performs smaller steps when printing and a bigger amount of ink is laid on the garment. This print mode is recommended for thicker, more absorptive type garments, like hoodies, as they require more ink in order for the printed outcome to be more vibrant.
Available print modes on Digital Factory Apparel Polyprint Edition v10
White Ink Strength
- Right-click on your uploaded image. Select Job Properties.
- From the left side menu, go to Underbase and from the drop-down menu, choose Processing Options.
- At the Maximum Ink % (White Ink Strength) move the slider bar at 100%.
Ink Passes
- From the toolbar, go to Tools and then select Options.
- At the “General” page, select the box that says Show advanced settings and options. Click on Save and Close.
- Double-click on your uploaded image and at the left menu, go to Color Layer.
- From the drop-down menu, select Printer Options.
- At the “Options” page, increase the Ink Passes at 2. Then, press OK.
Caution: The Ink Passes should be increased only in the case of White ink. Never alter them on CMYK inks.
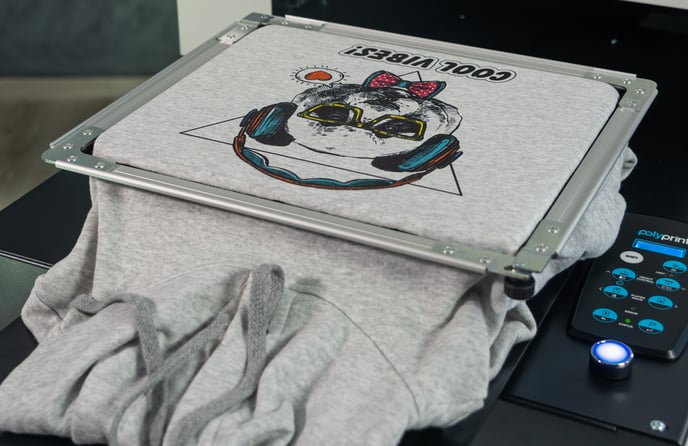
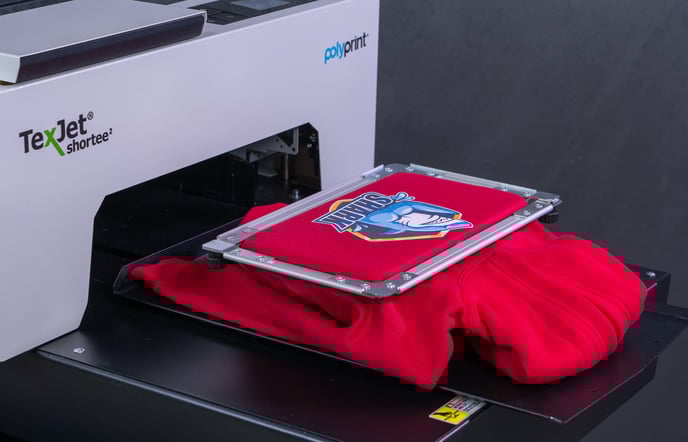
Loading the hoodie to the printer
Platen selection
Make sure to choose the right platen for your design’s size. TexJet printers offer a variety of platens that come in different shapes and sizes, covering multiple applications. They are, also, equipped with two specially designed platens for hoodies, where you can tuck away the pocket, so you can have a smooth printable surface and safe printing can take place. One has dimensions of 33x27cm (13x10.6in) and the second option has dimensions of 27x14cm (10.6x5.5in) and its more suitable for kids' hoodies.
Auto height adjustment
In order to gain sharp details and vivid colors, your fabric must have the right distance from the printhead. This can be easily achieved with the Auto height adjustment feature – all TexJet printers have it. The platen’s height is automatically adjusted, resulting in precision printing and keeping the printhead safe from fibers.