-1.png?height=120&name=Polyprint%20Logo%20(Dark)-1.png)
The right way to accurate place a t-shirt on the printer’s platen, along with helpful tips that will ensure a smooth, wrinkle-free surface ideal for printing.
Direct-to-garment printing is an innovative technology that can deliver outstanding results, when the process is precisely followed, without skipping any steps. The first and the most important step when you are about to print, is to accurately place the fabric on the printer’s platen.
During the garment placement certain steps must be performed, in order to attain excellent quality prints. These steps are the following and must be taken into consideration every time a printing job is about to happen, as every textile has different characteristics hence, it requires different handling.
Step 1
Heat press the garment for about 5 seconds. By doing this, you are basically ironing the fabric, thus creating a smooth surface, without any wrinkles, and at the same time you get rid of excess moisture.
Tip: If you are working with very fibrous textile, an item that would come in handy is a fabric glue roller. This type of roller can help remove excess fuzz and fibers, improving uniformity. Use gentle strokes and not harsh scrubbing in order to avoid wrinkles.
Step 2
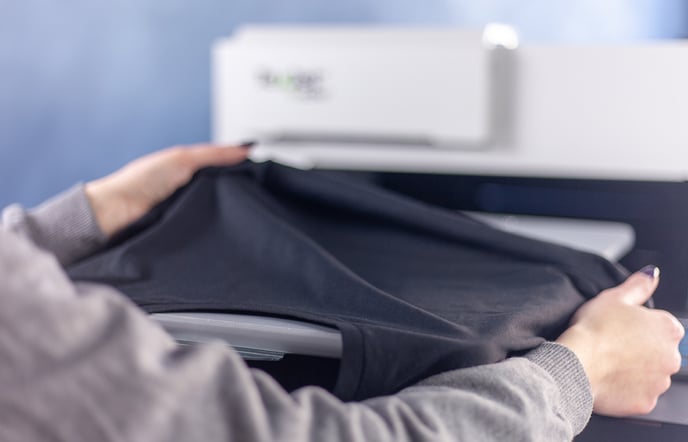
When you are working with wearables such as t-shirts, hoodies, trousers etc. the best practice is to wear the garment on the platen. This kind of clothing is double-sided and for this reason, you can exclude the side that you don’t want to print on (or print later), by getting rid of excess fabric that otherwise would add an extra layer of unwanted thickness. Also, you avoid ink penetrating the first layer and bleeding through. Wearing the garment means that the platen is “inside” it and as mentioned before, only the side that will be printed on is facing the printhead.
Step 3
Make adjustments, in order to create a smooth printable surface. Start by positioning the fabric in the desired way and flatten out the surface with your hands. Depending on the platen that you are using, a frame choice may be available. If so, the frame will stretch the fabric and lock it in place, eliminating the chance of it moving, during the printing process.
TexJet echo2: Available platen options
TexJet shortee2: Available platen options
Note: Be careful not to over-stretch the garment, as the fibers will be pulled apart and the weaving will become loose, resulting in ink loss.
Tip: If a platen isn’t equipped with a corresponding frame or the fabric’s thickness doesn’t allow a frame application, then fabric glue is essential. Spray the platen before wearing the garment on the platen, and then proceed on applying and flattening out the fabric.
Step 4
Make sure that the right distance from the printhead is achieved, in order to receive prints of scalpel-sharp details and high-quality coloring. This process can be accomplished automatically by the Texjet printer itself, by pressing the “Auto” button on the platen’s control panel, after placing of the fabric on the platen. The auto height adjustment feature is of great importance, as it ensures the best printing quality possible and extends the printhead’s lifetime.
TexJet echo2: Auto height adjustment feature & why it is important
TexJet shortee2: Auto height adjustment feature & why it is important