-1.png?height=120&name=Polyprint%20Logo%20(Dark)-1.png)
A step-by-step guide on how to install the Digital Factory Apparel Polyprint Edition RIP software on your NG printer.
Note: CADlink’s RIP software is already installed on the NG PC. This guide is in case a fatal corruption occurs, and the user must reinstall the printing RIP software. Internet connection is required during the installation of the software.
Program Installation
STEP 1
Copy the installation files from the Polyprint USB driver to the hard drive. Extract the files from the copied folder to your hard drive.
STEP 2
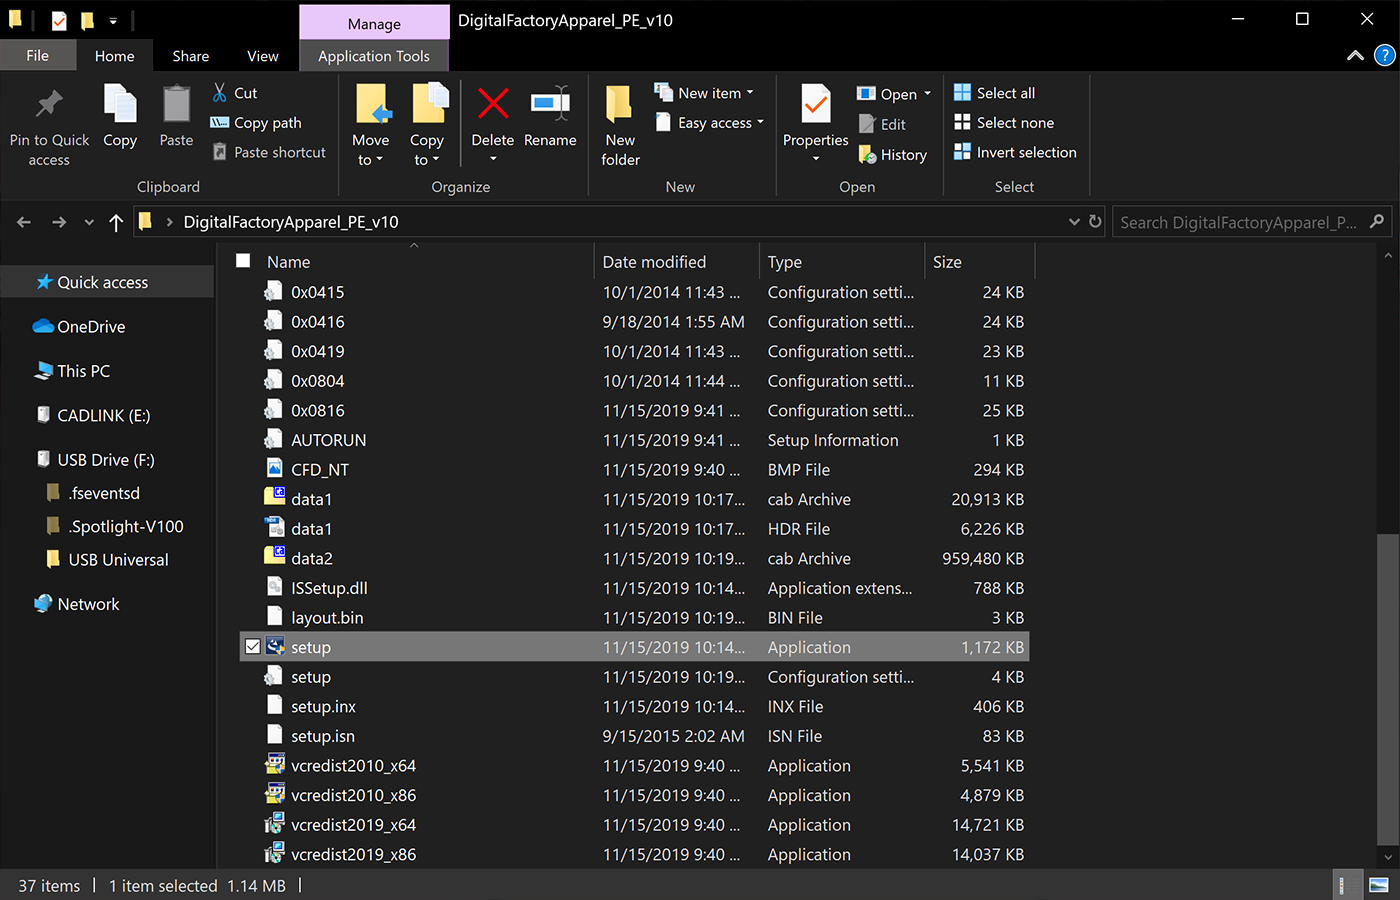
Open the folder and execute the installation file setup.exe as administrator.
STEP 3
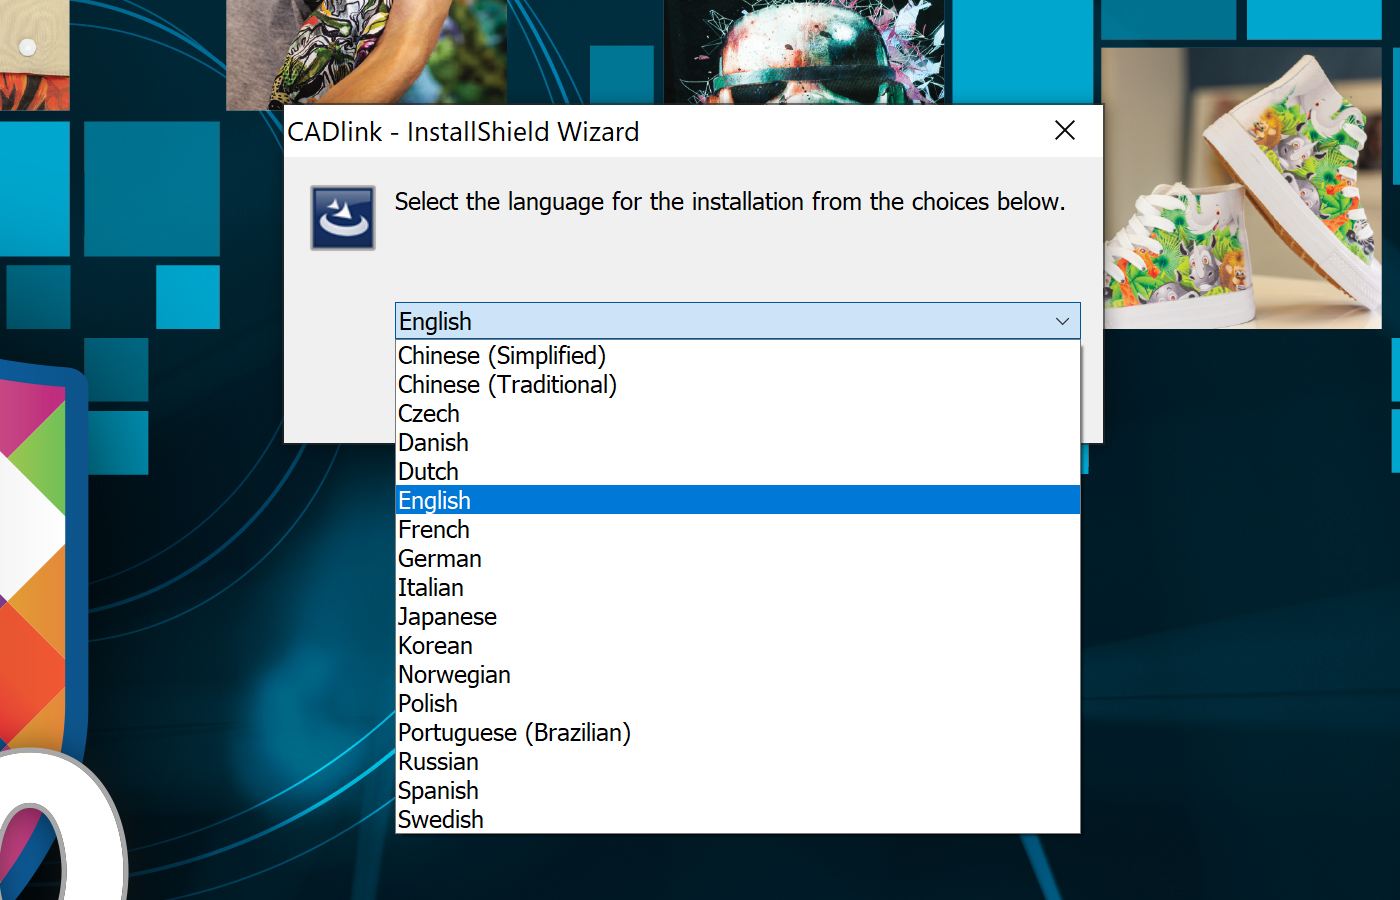
Follow the instructions. First select Language and click OK.
Note: You can switch language from the Tools tab at any point.
STEP 4
Connect CADlink’s Digital Factory USB driver to the PC and click Next.
STEP 5
Select the 64-bit version depending on your system specifications and click Next. Read and Accept the license agreement and click Next.
STEP 6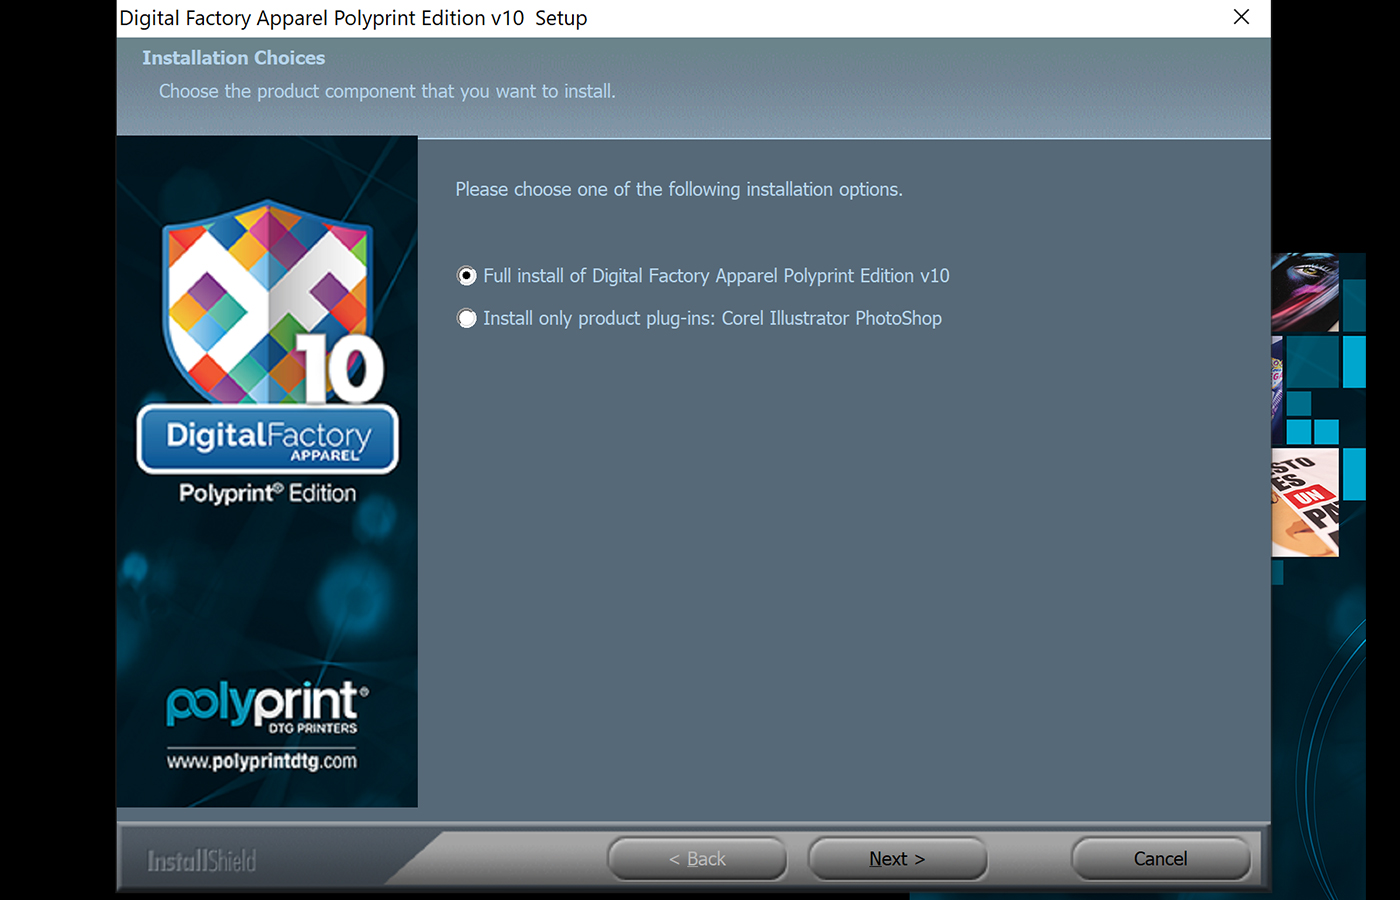
Select Full Installation of the Digital Factory Apparel Polyprint Edition and click Next.
Note:
If you wish to install only the third-party software plugins, to quickly transfer your files from your designing-editing software to Digital Factory, select the second option. Those plugins are included in the full installation.
STEP 7
When done, click Finish to complete the installation.
Printer drivers installation
From the Windows Start menu, select All Programs > Digital factory Apparel Polyprint Edition.
STEP 1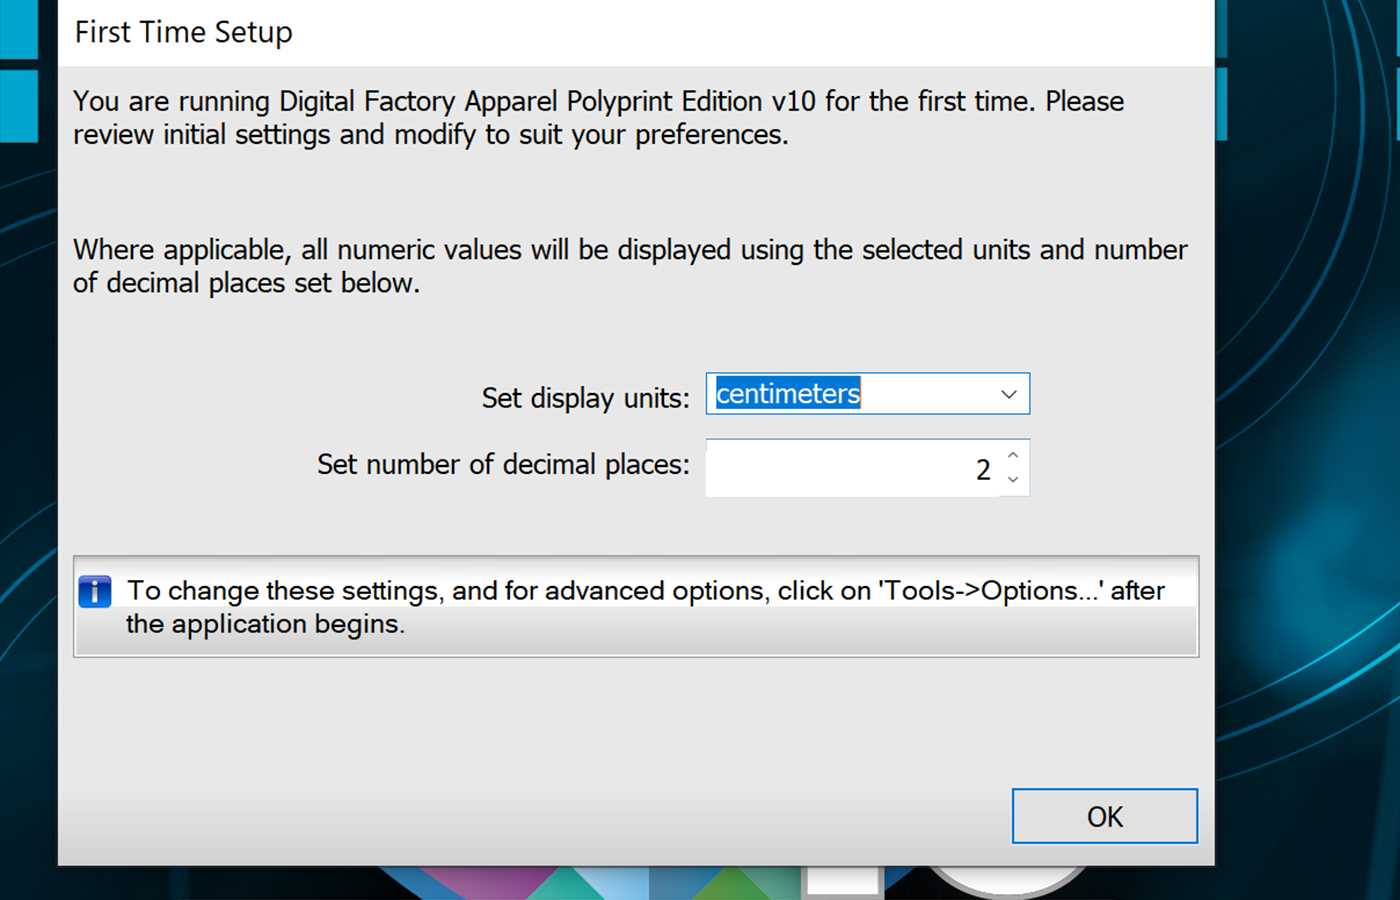
First Time Setup screen will pop-up. Select the desired display unit, number of decimal places and click OK.
STEP 2
In Create Queue Wizard, introduction page, click Next.
STEP 3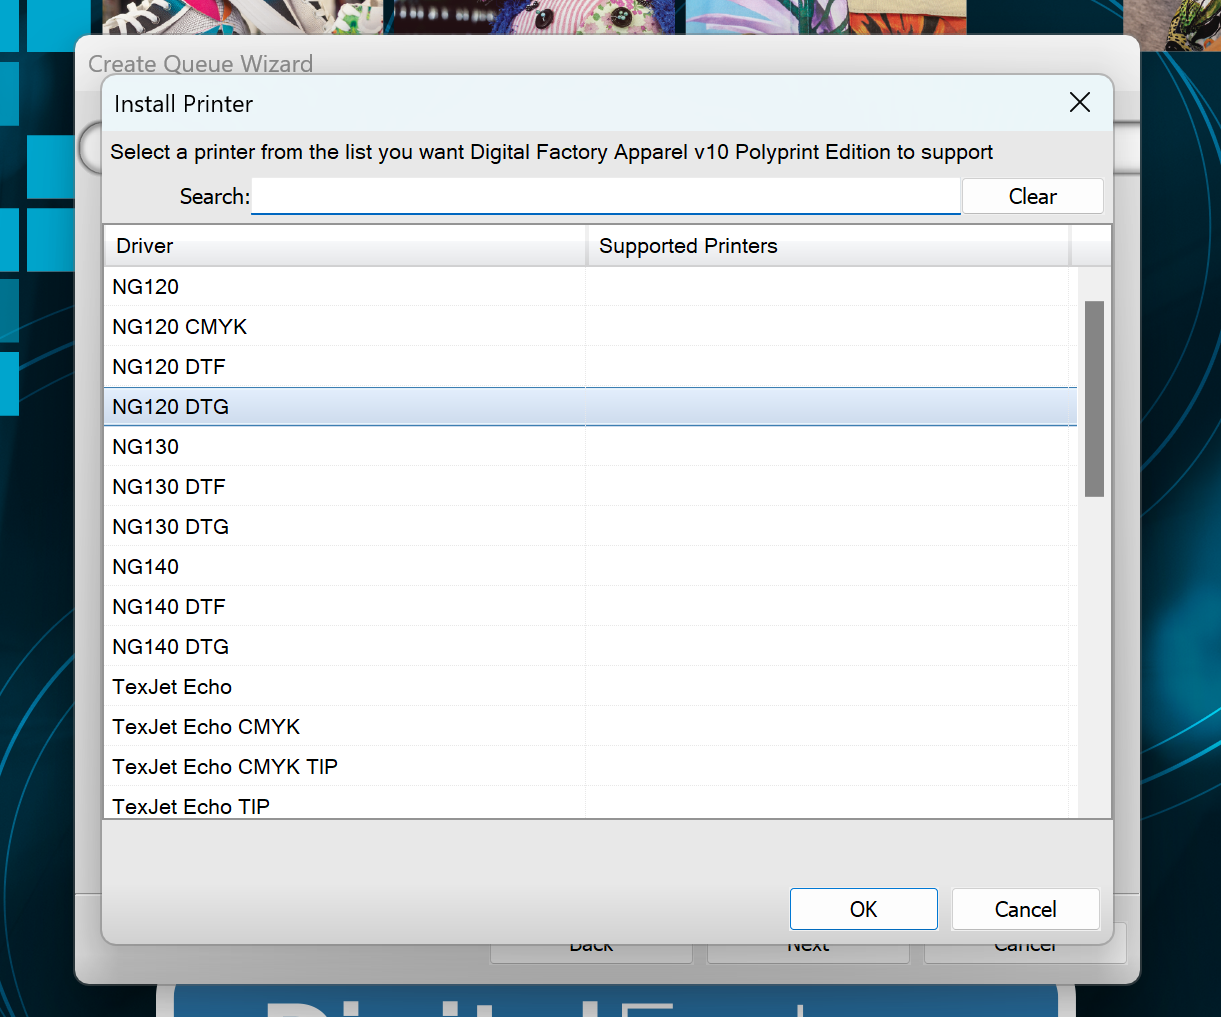
On the Install Printer pop-up window add first the NGxxx DTG printer. For example, NG120 DTG and click Next.
Note: The NGxxx DTF queue will be installed later on.
Caution: If the separate DTG and DTF printer drivers are not visible (i.e., NG120 DTG and NG120 DTF) contact our support team at: https://polyprintdtg.com/support/
STEP 4
The wizard will download the latest drivers from the Web. Click Next and then Finish when download is completed.
Note: If you are using an older formulation of Texjet Inks follow the guide below on how to install the appropriate ink set profiles.
Digital Factory Apparel v10 Polyprint Edition: How to install the drivers for Texjet® Inks
Port configuration
STEP 1
Make sure Texjet NG series printer is in READY state and USB cable is connected at the right port.
STEP 2
At the RIP's toolbar find the Queue tab and click Manage Queues. For the DTG queues select the TCP/IP port setting:
STEP 2.1
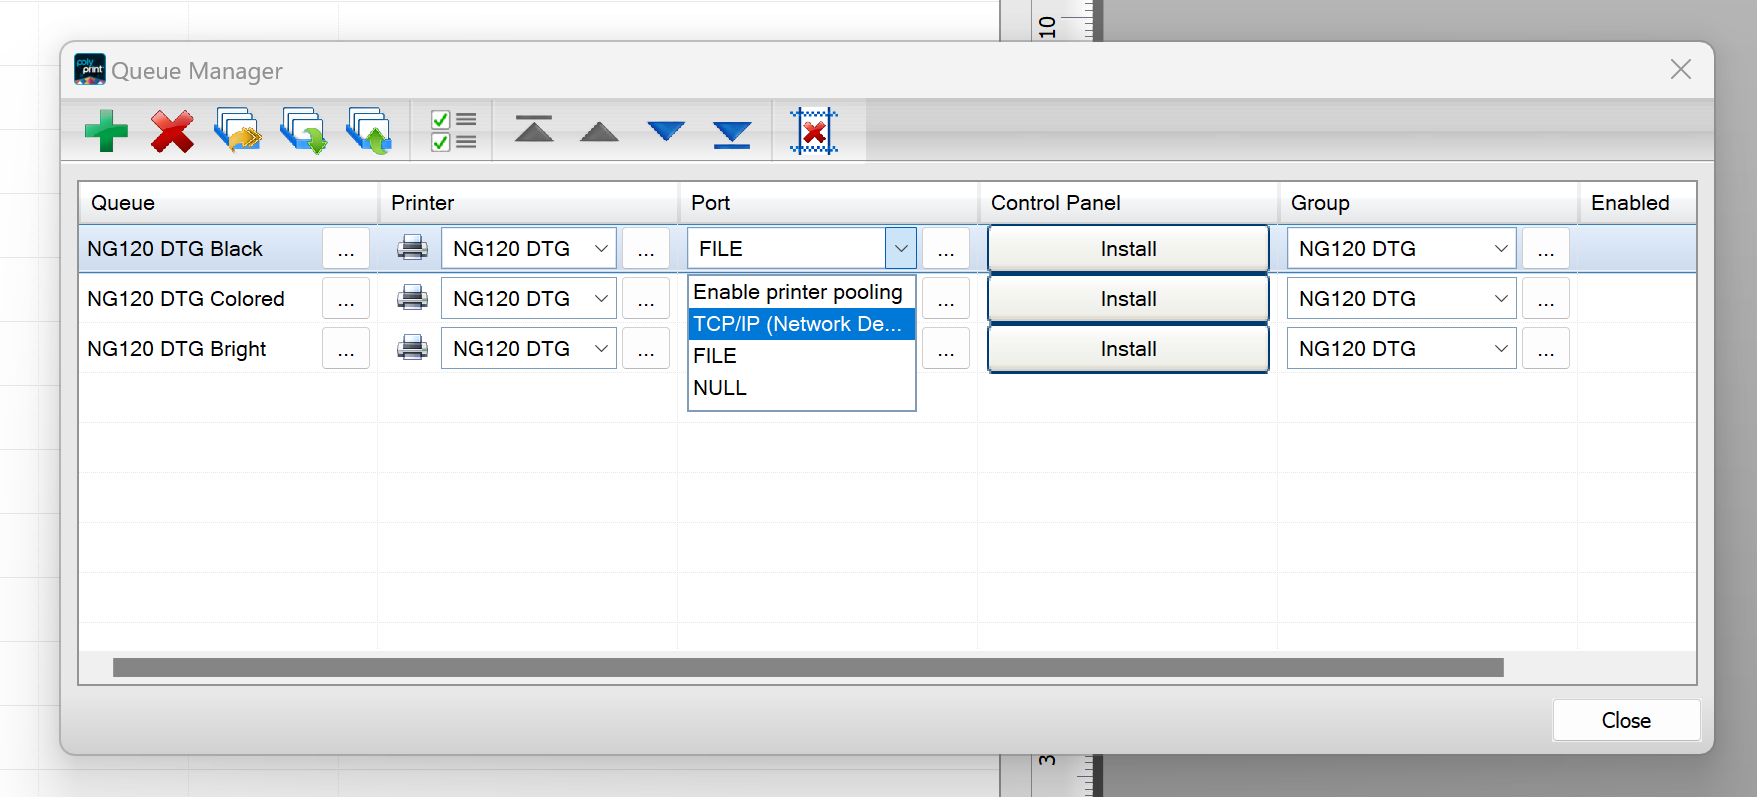
At the Port column select TCP/IP (Network Device) for all queues.
STEP 2.2
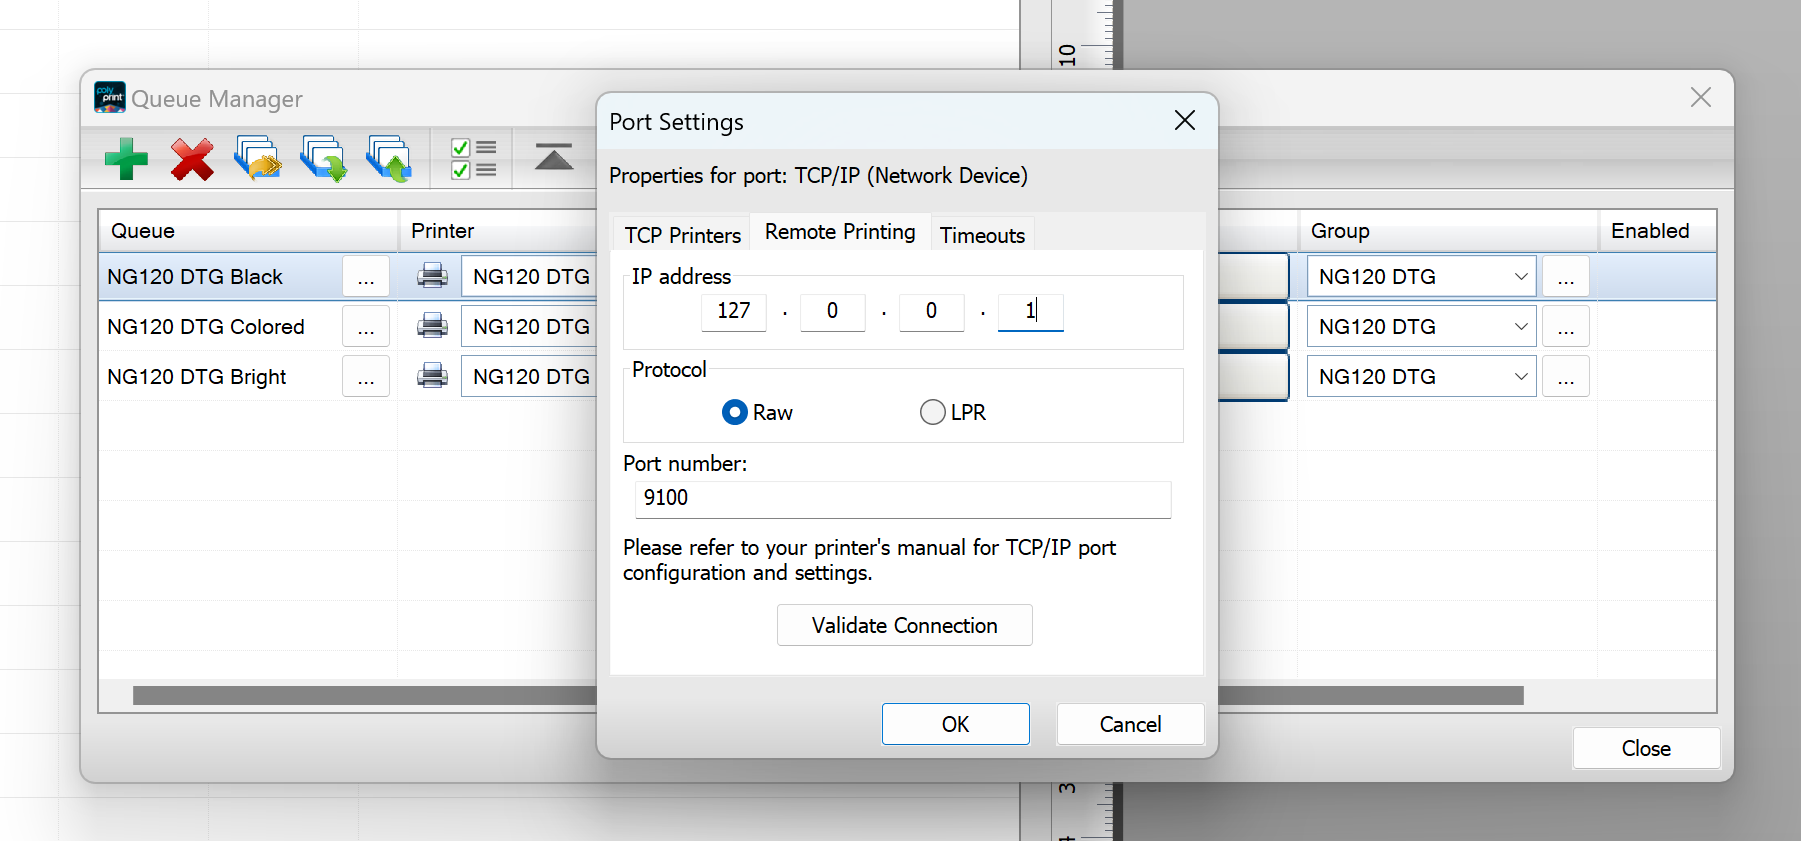
At the window that pops-up go to the second tab named Remote Printing and manually type the following address: 127.0.0.1. Click OK. Ignore the "Unable to Validate Connection" message and proceed with OK.
STEP 3
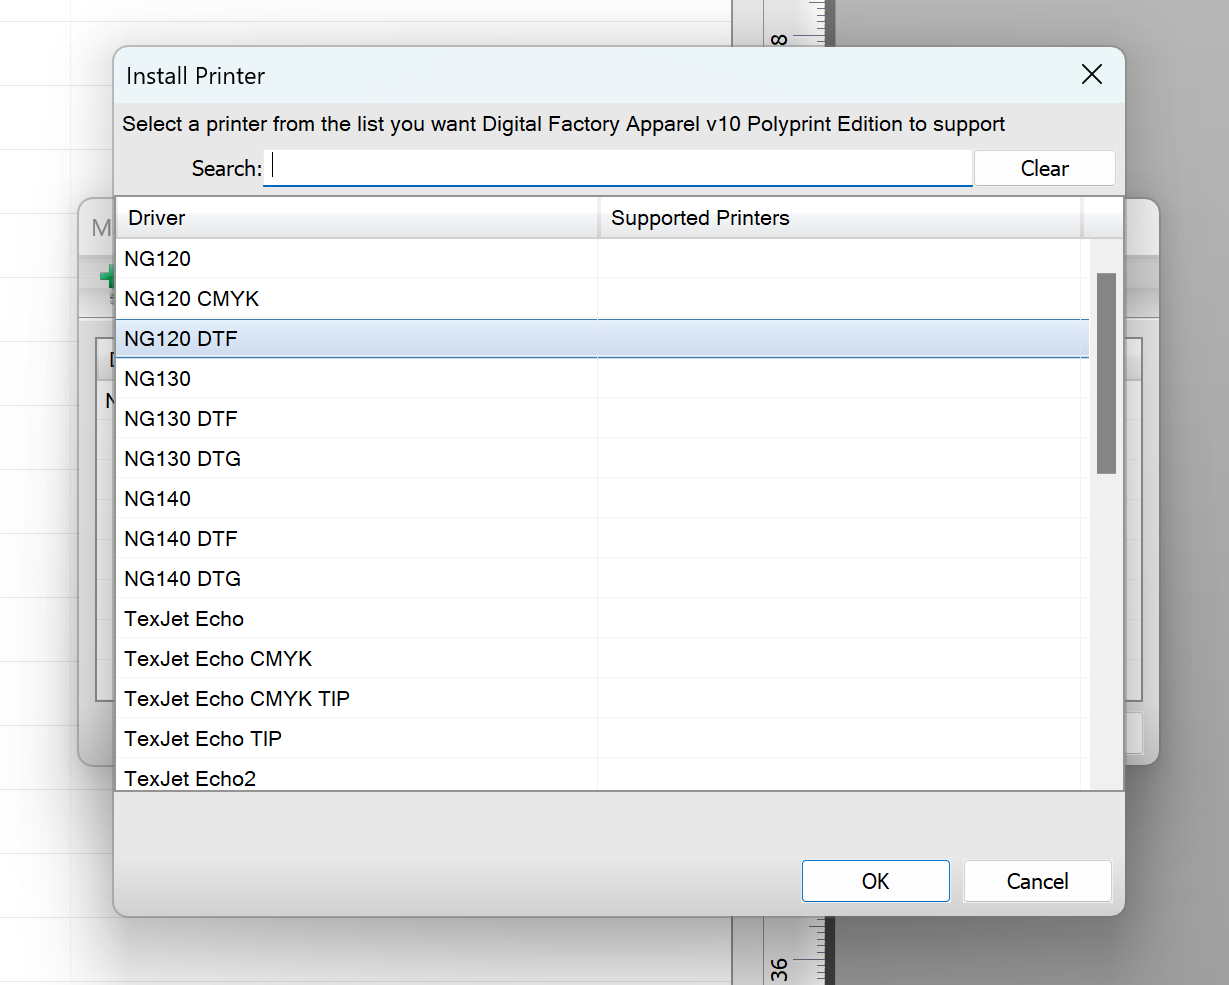
Go to Devices and then Manage Devices. With the Install Printer icon add now the NGxxx DTF. For example, NG120 DTF.
STEP 4
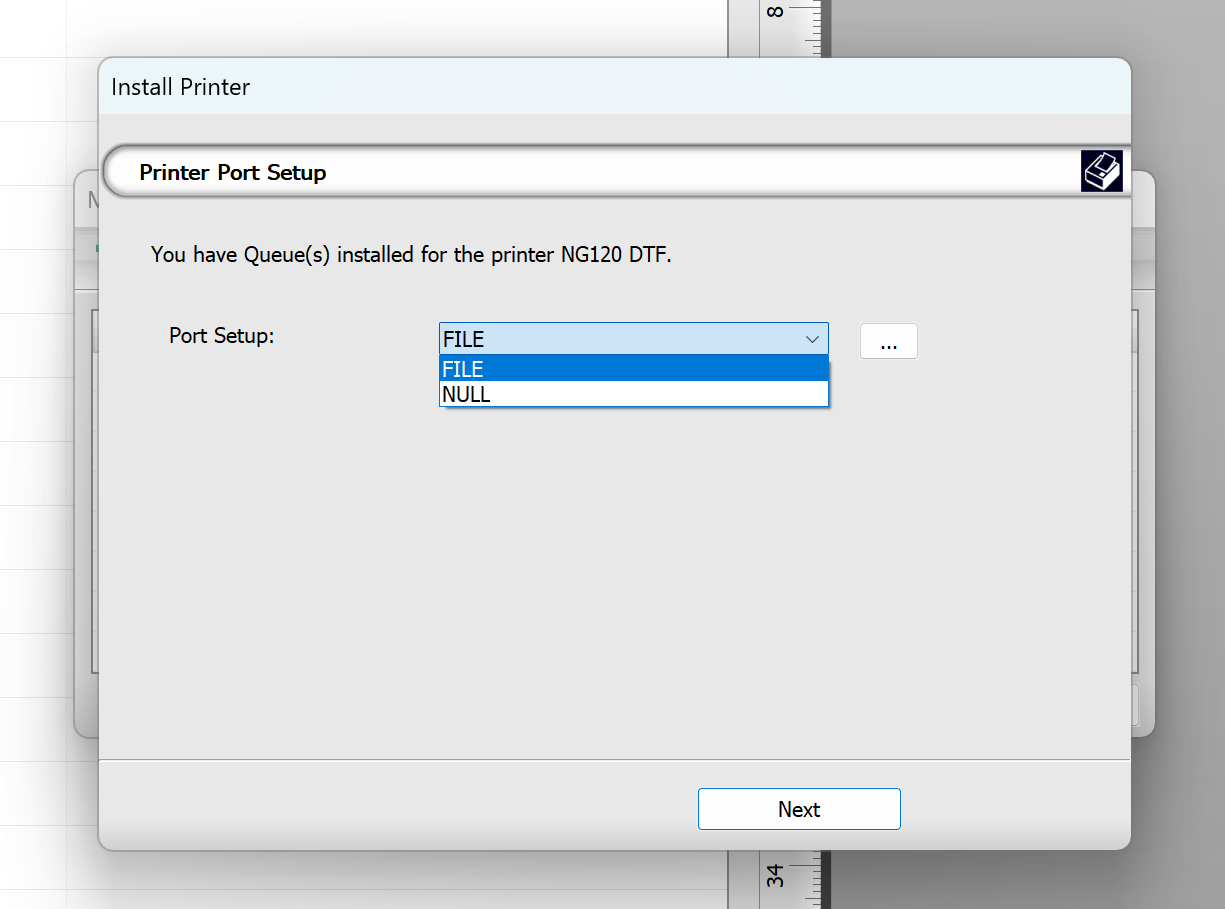
At the Printer port setup window that pos-up, select the FILE setting from the Port Setup option.
STEP 5
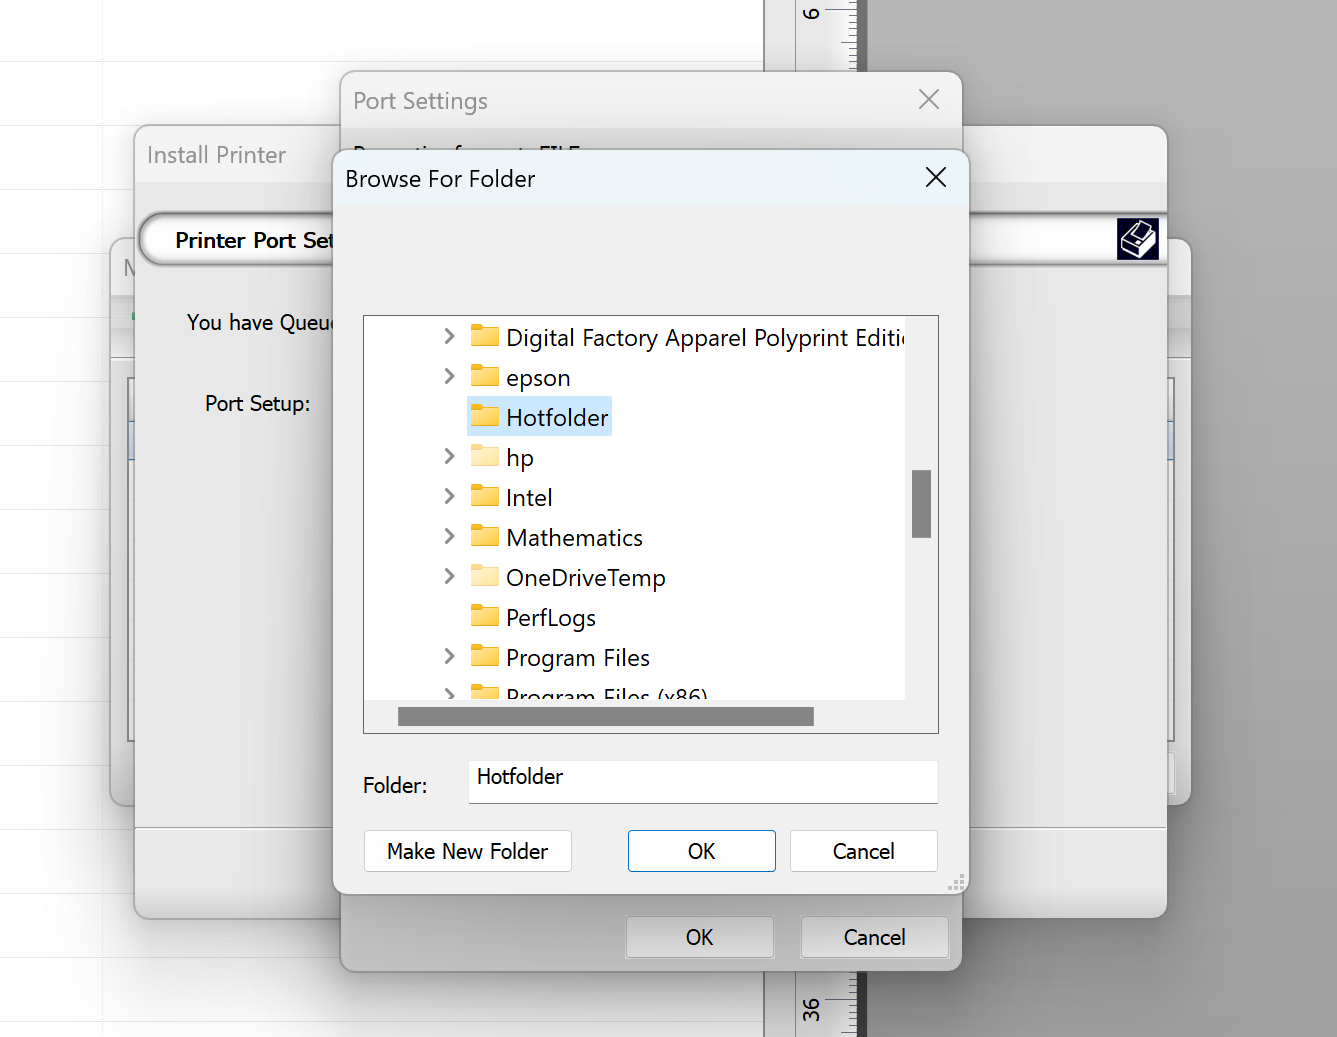
Click on the three dots right next to FILE and at Output Folder browse and select the C:\Hotfolder\ .This is the Hot-Folder of the Printer Manager software.
STEP 6
Check that the file setting of the file properties is as following: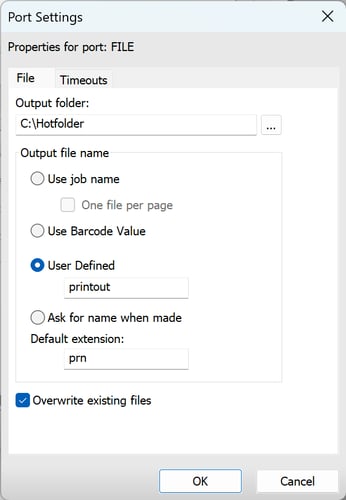
STEP 7
At the Timeouts tab set the bellow values:
Initial: 40
Retries: 30
Status Check: 5