-1.png?height=120&name=Polyprint%20Logo%20(Dark)-1.png)
All you need to know about NG printers’ Touchscreen functions. Navigate with ease through the options and perform standard procedures.
Home Page
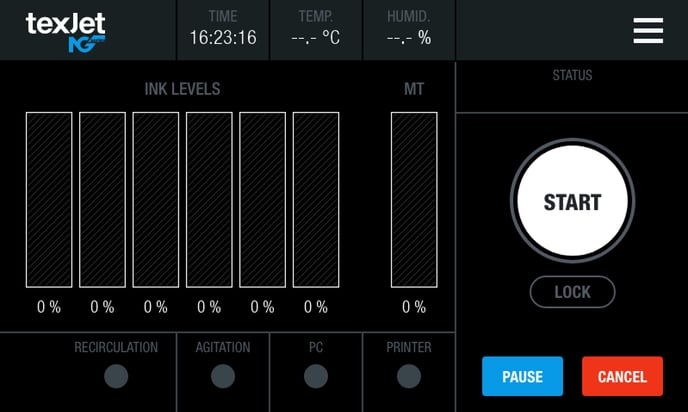 At the top row you can find Time, Temperature and Humidity levels along with the Menu button on the top right corner.
In the middle area the Ink Levels are shown, along with the Maintenance Tank (MT) level so you can always be informed about the ink quantity in the Main Tanks and the fullness of the waste tank.
The Status of the printer, whether its Idle, Printing, or Error, etc. is shown, and it’s linked to the Notification System.
The Start button is located at the far right and has the same function as the White LED button on the Keypad – both are sending the platen inside for printing, when a print job is pending. Beneath the Start button is the Lock button which automatically takes the platen inside. Pause and Cancel print job buttons are also present.
At the bottom row you can find the Recirculation, Agitation, PC and Printer status, meaning if the circle goes green its active and if its red its inactive.
Note: If you tap on the Texjet NG logo at the top left of the screen you can view the Firmware and Hardware versions.
Menu Page
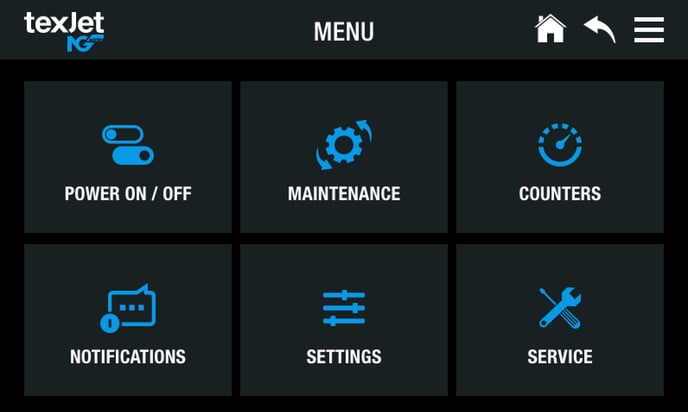 Check below the functions of each page:
POWER ON/OFF
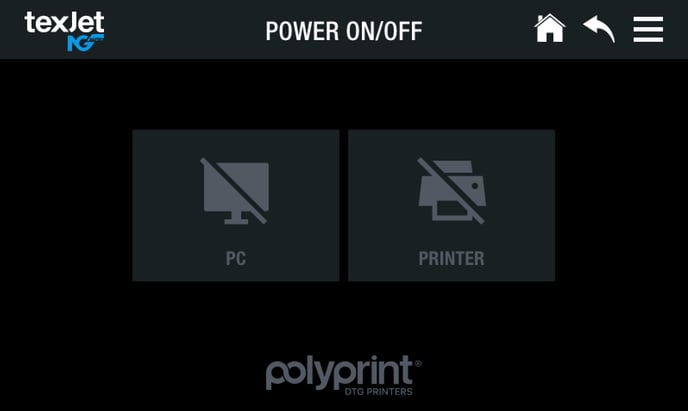 In this page you can find the wake-up and shut-down buttons of both the Printer and the PC. By tapping the same icon, you either initialize or terminate their function. When a crossed line is visible on the icon means that it is inactivated.
MAINTENANCE
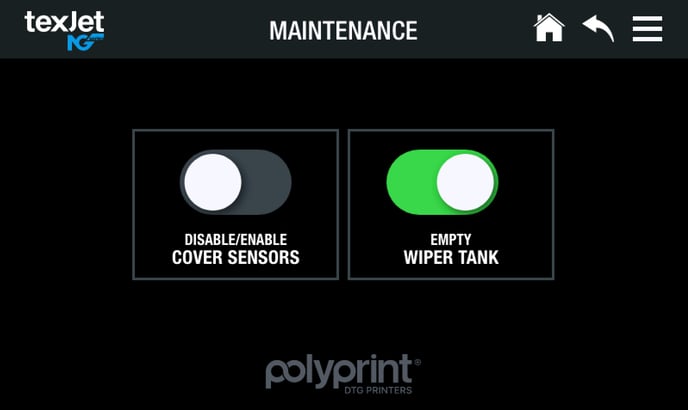 Here you can find the Disable/Enable Cover Sensors and Empty Wiper Tank toggle buttons. Both are used during the printer’s maintenance. The first controls the covers’ sensors allowing you to open the covers safely and the second the pump that drains the maintenance liquid from the Wiper Tank.
Caution: Do not open the printer covers without disabling the covers sensors first, otherwise the Emergency System will be engaged and you will have to restart the printer.
COUNTERS
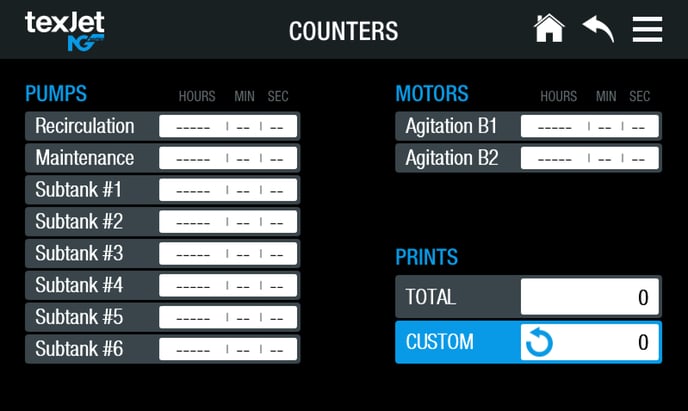 The pumps and motors’ lifespan are visible, so you can keep track of the printer’s functionality. Very useful as you can easily understand if everything is working properly (i.e., if a pump has only a small active time compared to the others, then it doesn’t function as it should). Also, you can view the total print jobs to keep track of your production. A Custom option is available so you can track through a specific timeframe your jobs.
NOTIFICATIONS
Being proactive, the machine uses built-in safety and proximity sensors to notify you in every stage of your production process. Yellow and Red notifications are about non-critical and critical errors respectively that warn you for certain actions (i.e., a cover is open, the emergency safety system is engaged, etc.). The Blue notifications have an informative purpose.
SETTINGS
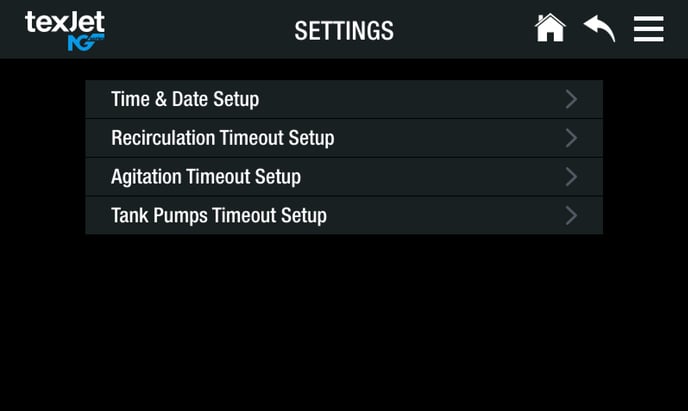
Time & Date Setup. Set the correct time and date according to your time zone. Those are visible on the Home page, along with the ambient environmental conditions of your workspace (temperature and humidity).
Recirculation Timeout Setup. Control the white ink’s recirculation time, by setting the active and inactive minutes of the pump. Bring back to default settings anytime with the Default button.
Agitation Timeout Setup. Control all inks’ agitation time, by setting the active and inactive minutes of the pump. Bring back to default settings anytime with the Default button.
Tank Pumps Timeout Setup. Adjust the timeouts of the Subtank’ pumps on normal operation and during the Fill Up process, plus the active time of the maintenance pump. Bring everything back to default settings with the Default buttons.
SERVICE
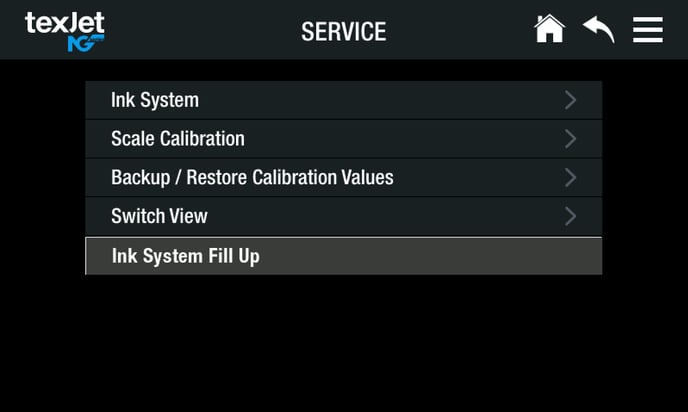 Ink System. In View Mode you can check visually every function of the ink system mechanical flow parts. When the circle is green, at the time you are viewing, the respective pump or motor is running. If grey, then it’s inactive at that moment. When red, means it stopped working and its fatal. In Manual Mode, by pressing continuously on the circle you activate manually for as long as you have pressed the respective pump or motor. As a default timeout of 8 seconds exists, to deactivate it you tap on Timeout ON.
Scale Calibration. The ink and waste levels shown at Home page derive from weight scales beneath the Main Tanks and the Maintenance Tank. The calibration of those scales is feasible through this page.
Backup / Restore Calibration Values. In case of a board change, the calibration values of the weight scales are backed up, so you can load them again after the service.
Switch View. The function of all machine sensors is visible through this page.
Ink System Fill Up. A page dedicated to the ink charge process.
Caution: We don’t recommend changing any parameter on the Service page, as they can interfere with the machine’s correct operation. Don’t log-in to Service page otherwise told by a Polyprint authorized technician.