-1.png?height=120&name=Polyprint%20Logo%20(Dark)-1.png)
A step-by-step guide for successfully curing inks when using a heat press.
All inks that are used in the dtg printing process must undergo curing with heat, in order to be stabilized on the surface of the garment and to achieve wash endurance. A commonly used curing equipment for fixating dtg inks and pretreatment liquids, is the heat press. The pressure feature provides a flat surface for smooth ink coverage that results in a softer and shinier printed outcome.
Steps for curing the ink when using a heat press:
STEP 1
Make sure that you have a properly ventilated workspace. The drying of the inks will cause the release of vapor, which contain volatile chemicals. The use of a protective mask is suggested.
STEP 2
Set the heat press to the right temperature, pressure and time. Those parameters can vary depending on the ink characteristics. Every set of inks has different fixation parameters that usually are suggested from the manufacturer.
STEP 3
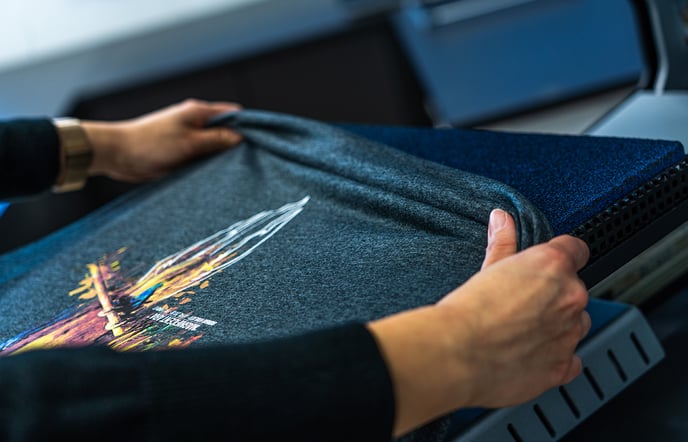
Gently remove the printed garment from the printer and place it on the heat press. It is recommended to wear the t-shirt to the press platen, instead of just placing it on top, in order to avoid the marks that will be created in the back of the fabric due to the press foam. Especially, in the case of printing on both sides of the t-shirt, the “wearing technique” is the best option.
Tips:
- When a print is consisted of large solid white ink areas, it is highly recommended to let it airdry for some time, in order to let excess humidity from the inks evaporate. This way, the ink sets better and when its time to press it it doesn't crack or form spots (white peaking through the CMYK layer).
- Some heat presses are equipped with a hovering feature, where the press platen is hovered over the fabric without coming in direct contact with it. This is a very useful feature for curing garments that are printed with increased ink quantity. This way, by hovering the garment for a few seconds, in order to remove excessive moisture and then pressing it, you avoid ink splattering. In addition, the hovering feature can be used for fabrics that are sensitive to heat and may be damaged if they come in direct contact with the presses’ hot surface, or for the DTF technique.
STEP 4
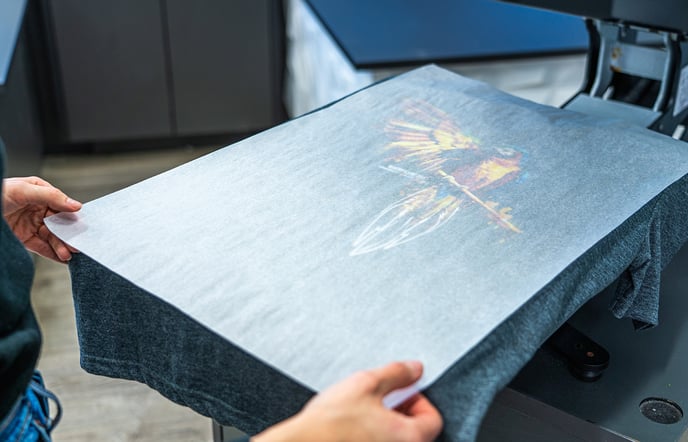
Lay a protective parchment sheet on top of your fabric, so that the printed area won’t come in direct contact with the hot surface. These sheets should be disposed of after being used a few times. This avoids build-up of residue on the sheets which can lead to staining or discoloration, and wrinkles due to the humidity. Proceed to press the fabric in the temperature and time that is suggested for each corresponding ink set.
Tip: Some heat presses don’t have the ability to efficiently release the extra moisture during the fixation process. For the majority, these are the ones that are not designed for DTG use. In those cases, it is recommended to press the garment for 5 sec, open the heatpress to release extra moisture and then, repress for the remain fixation time.
Note: If the inks are still wet, re-press the garment for a few more seconds until it is completely dry. This may be an indicator of excessive ink quantity. Also, you should check if your heat press has uniform temperature throughout its surface and if it removes properly the moisture.
STEP 5
Remove the printed fabric from the heat press and let it cool off.