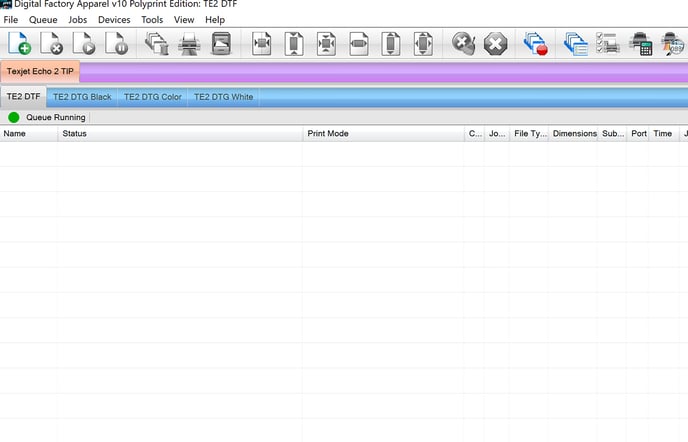
All the print queue options that the RIP software offers and their use according to the substrate’s color and the image type.
Digital Factory Apparel Polyprint Edition features a centralized hub that supports multiple print queues, simultaneously. Each of those, easy access, queue tabs includes preset color management and underbase settings and displays the in process and pending printing jobs.
 Depending on the color of the substrate that is about to be printed, three DTG queues have been created in order to achieve the best printing outcome possible that together with the print mode selected, will complement the garment's color. These are the Black, Color and White queue tabs which, as their name suggests, are queues with preconfigured settings, destined to be utilized each time the user wants to print in the corresponding color textile.
The fourth tab named DTF, is dedicated to all the print modes used in the DTF process, according to the substrate's color that the design will be transferred at.
Caution: Those print queues - and print modes included - have integrated specific color management to complement Polyprint’s new ink range, the Texjet Inks. Make sure that you are using the correct driver according to the ink configuration that are loaded to your printer.
DTG Print Queues
DTG White
This queue tab has been created for white and light-colored fabrics that, when you print upon, don’t require a white underbase. Meaning, that when you choose to print a design that contains white hues, the queue will automatically remove them and print only in CMYK configuration, excluding the white ink from being used.
DTG Black
When printing on black garments or dark-colored textile that doesn’t require any black ink, then the Black queue is the one that must be chosen. This queue removes, by default, any black elements on the design, resulting in zero black ink waste; hence no white ink will be printed in those areas. This results in a print with a softer feel, as less ink is being printed.
Note: You can adjust the black element spectrum (hues close to black) that you want to remove with the Knock me black out setting.
DTG Color
This printing queue results in an outcome, exactly like the design that you have chosen. Meaning, that none of the colors that are incorporated into the digital image will be excluded and all the ink set (CMYKW) will be utilized for the printing procedure.
Tip: If you wish to remove a specific color, similar to your fabric's, then you can utilize the Knock me out color setting. Similarly, to the Black queue case, mentioned before, the print will have a softer feel, as the ink quantity will be reduced.
Note: The Photo feature is set as default in all the DTG print queues. You can change it through the Color Adjust, depending on your preferences and the design’s needs.
Check the DTG print modes for TexJet echo2 and TexJet shortee2.
DTF Print Queue
This print queue is dedicated to the DTF printing method, meaning that you must choose it when you want to print on film. Opposed to the DTG method that the queues are responsible for printing on specific color garments, in DTF the print mode is the one that is respective to the color fabric that the design will be transferred.
For example, if you want to print on a blue t-shirt you must select one of the DTF Color print modes. In contrast with DTG, the CMYK colors will be printed first and then, the white layer will follow.
Check the DTF print modes for TexJet echo2 and TexJet shortee2.
Tip: Apart from the default print queues, the Polyprint RIP software gives the user the option to create his own customized ones. This way, the user’s preferences regarding specific settings are being registered in separate queues and even a dedicated print plan can be saved in a different queue.
-1.png?height=120&name=Polyprint%20Logo%20(Dark)-1.png)