-1.png?height=120&name=Polyprint%20Logo%20(Dark)-1.png)
The actual DTG process of printing on dark colored shirts: an optimized workflow nailed down in steps.
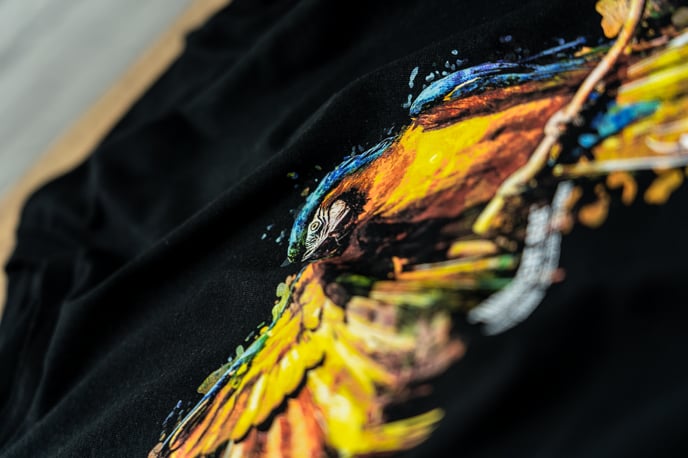
Here follows a detailed guidance on how to print on dark colored shirts (black tees). This guide is based on printing on cotton, cotton blended (tri-blended) & light colored polyester shirts which are the most commonly used types of substrates in the DTG industry.
In general terms, the whole process consists of three main stages: pretreating (steps 1-4), printing (steps 5-7) and curing (step 8). However, before the actual printing process, there are a few initial requirements that must be taken into consideration.
These start with setting up the workstation; the printer should be turned on properly, cleaned and maintained under the manufacturer specifications. Preparing the heat press (or the conveyor dryer) is also essential so to avoid any downtimes. Shaken cartridges and the daily quality control (nozzle check) are suggested while at the same time, the print designs can be prepared. Always make sure the printer works under the right humidity terms & temperature and that the garment choice is right since the optimum material is the combed, ringspun cotton.
Once operators abide by the above conditions, they are ready to start printing as described and instructed in the following detailed steps:
Fabric preparation
Step 1
Heat press the garment for 5-10sec to help humidity evaporate and to flat out the fibers.
Step 2
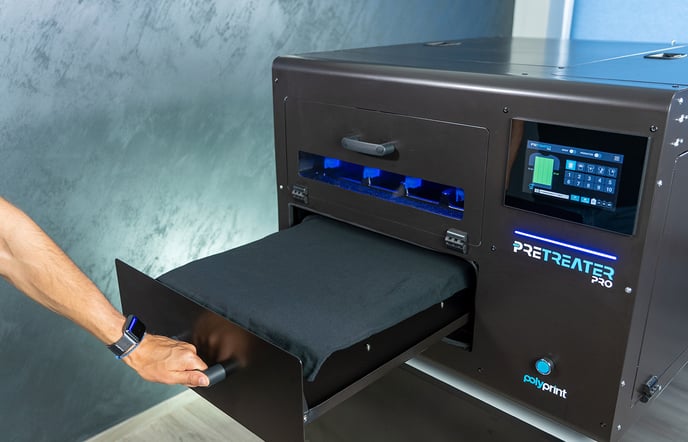
Pretreat the garment: Apply the pretreatment solution to the print area. This prevents the DTG inks from soaking into the garment and allows them to sit directly on top of the shirt, delivering the high resolution output that the DTG technology promises. Pretreatment liquid can be applied via 2 ways:
- Manually: Use a spray gun and make sure all areas in which ink will be laid down are covered in order to avoid misprints.
How to apply pretreatment manually - Automatically: Use a pretreatment machine for print quality and production consistency
PreTreater Pro: Basic pretreating process
Tip: Apply double pretreatment liquid quantity when garment fibers are thick to penetrate like hoodies of polyester.
How to print on hoodies with TexJet dtg printers
Check here: Why pretreatment is needed in the DTG industry?
Differences and similarities of DuPonts' P5001 and P5003 pretreatment liquids
Step 3
Use a roller to spread the pre-treatment liquid equally & evenly so that is looks and feels homogenous. This contributes to the maximum print quality and color coverage.
How to avoid pretreatment stains
Step 4
Heat press the shirt again for 30-40sec to fix the pretreatment liquid into the fibers of the garment. Optimum heatpress temperature is 160-170 oC (320-338 F). You are ready to proceed to the next step as long as your garment is completely dry.
How to dry the pretreatment liquid when using a heat press?
How to dry the pretreatment liquid when using an oven dryer?
Printing process
Step 5
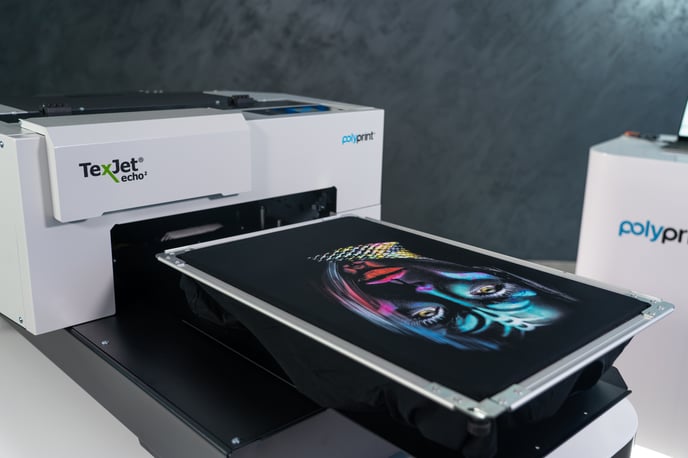
Load the garment onto the printer. Make sure you are using the relative platen and adjust it properly. The right positioning is crucial in order to get the desired output and not waste any textile.
How to properly place a t-shirt on the platen of a TexJet printer
Step 6
Prepare the printing & image settings via the Rip software or via the default built-in printer settings.
Basic printing process with Digital Factory Apparel Polyprint Edition v10
Step 7
Actual printing is taking place. With most printers, white ink comes first and colors come right after. Depending on the print mode you are using, simultaneous printing of both white and CMYK inks can take place.
Tip: When printing on pique cotton type of garment, you may want to apply more quantity of white ink.
Ink curing process
Step 8
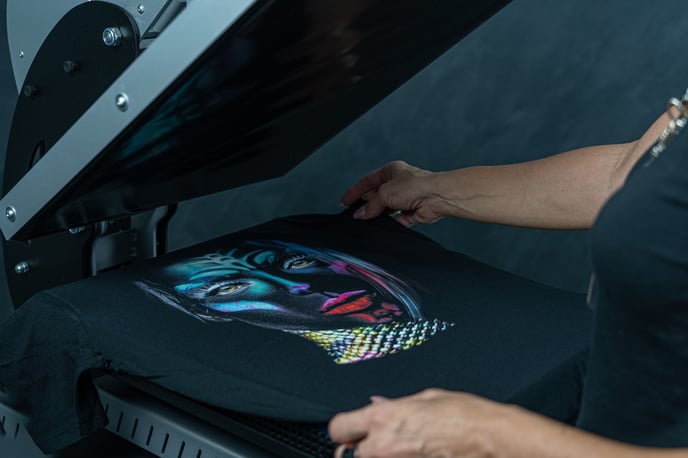
Fixation & Curing of the garment: Gently remove the printed garment, place it onto the heat press and set up the heating/pressing time. This should last about the time the ink manufacturer suggests. You can also cure the DTG-printed garments by entering them into a conveyor dryer. In this case, fixation time is usually more than the heatpress, but also note that you can load more than one piece of garment at the same time.
Curing Equipment in DTG: Heat Press vs Oven Dryer
Inks & Pretreatment Liquids: Fixation times and temperatures
Tip: When colors are solid, hover first to avoid any color spreads that will ruin the design.