-1.png?height=120&name=Polyprint%20Logo%20(Dark)-1.png)
A step-by-step process on how to safely charge the system with fresh ink after the printer was set with cleaner in the ink flow route.
An ink charge is the process of filling the printer’s ink flow route – from the cartridges into the tubes, dampers and finally to the printhead, with fresh ink. It is basically a very powerful tool that loads the ink to the printer and it is mainly used during the initial setup of the printer. The ink charge process can, also, be used for purposes of advance maintenance or for re-charging inks after the printer was set idle with cleaner in its route.
Caution: If you have just purchased a TexJet shortee2 printer please follow the full guide for a proper unboxing and installation. Check it here.
A service program or a software feature can execute the ink charge process, depending on your printers drivers. TexJet shortee2 is charged via the Digital Factory Apparel v10 Polyprint Edition. Before initiating any ink charge, though, you must take care of some other important parameters.
Follow the steps below so the ink is safely re-introduced in the ink flow route:
Ink Charge
Warning: Before charging the TexJet shortee2 ink system with another ink set brand, make sure that you have already purged it with cleaner solution and maintained properly the ink flow parts such as capping station, wiper and bottom of the printhead. If you don’t clean the lines and charge the inks there is a high risk of unwanted ink flow performance. Follow the Cleaner Charge process.
Caution: Empty the waste bottle prior initiating the ink charge process, otherwise ink spillage may occur.
STEP 1
 Remove the refillable ink cartridges that contain the cleaner solution from the ink system. Use brand new cartridges and fill them with ink. Place them to the ink system.
Caution: Make sure that you have placed each cartridge to its corresponding color socket.
Note: If you want to use the Ink Charge as a powerful cleaning method then, you don’t have to necessarily purge the system with cleaner. Advise always your technician.
STEP 2
Power on the printer as usual, following the instructions on the Platen Control Panel. Make sure that the printer is at "READY TO PRINT" state.
STEP 3
Connect your printer via USB to your PC or laptop. Open the Digital Factory Apparel v10 Polyprint Edition RIP software.
STEP 4
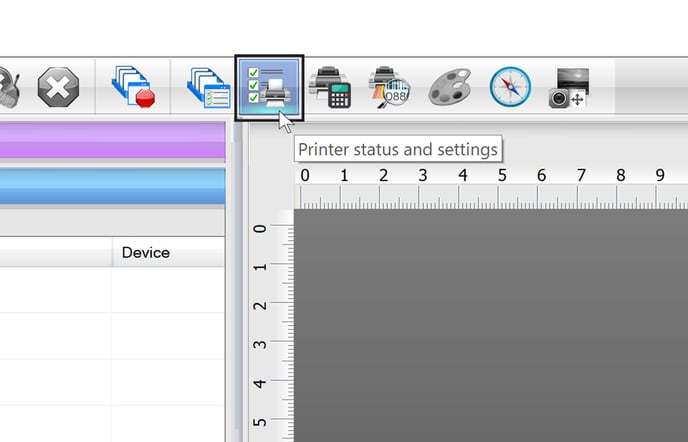 Go to the icons toolbar and select Printer Status and settings.
STEP 5
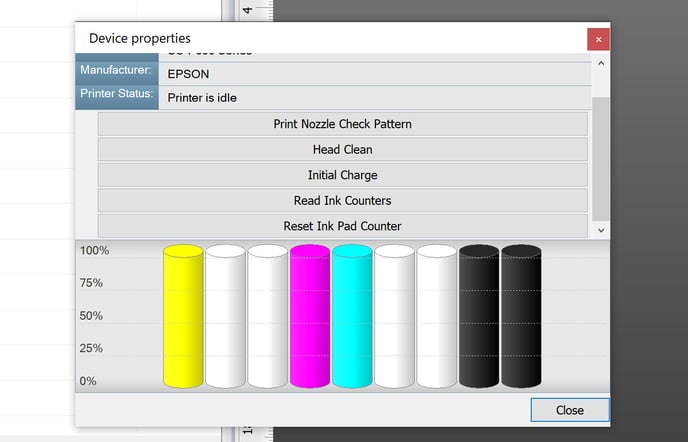 Click on the Initial Charge to start the Ink Charge procedure.
Caution: Be careful! Ink charge takes about 10 minutes, so do not turn off or unplug TexJet shortee2 while the ink charge is running.
Note: If after the ink charge, a message that reads “Ink Pad Reset” is displayed on the Printhead Control Panel, follow the guide to remove it.
STEP 6
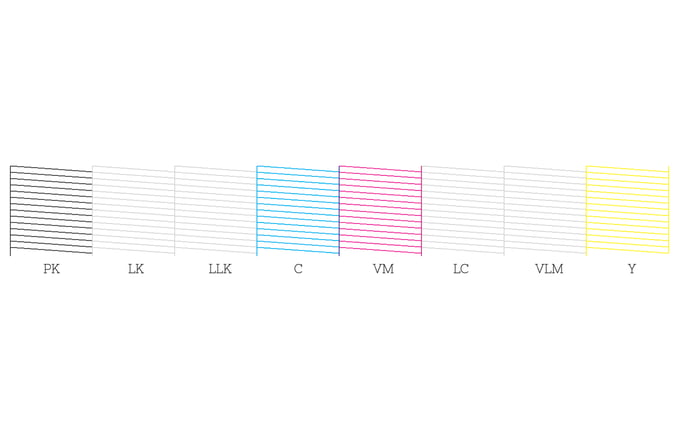 After the ink charge is completed, perform a nozzle test. Check if all nozzles are present and the color vividness of the inks. If a few to none nozzles are missing and the inks’ vibrancy – as they appear on the transparent sheet - is satisfactory, then you can proceed with printing.
Notes:
- In case of a considerable amount of missing nozzles and poor vibrancy of the inks, you can proceed with an extra Head Cleaning from the Printhead Control Panel. Check again the nozzle test to confirm that you have a proper nozzle check to begin with your printing process.
- Don’t forget to empty the waste bottle. Follow the Reset Waste Bottle process if necessary.